A Technical Guide to Managing Kubernetes with Terraform
 By opsmoon
A hands-on guide to using Terraform and Kubernetes. Learn to provision clusters, manage workloads, and automate your entire IaC workflow.
When you combine Terraform and Kubernetes, you establish a unified, code-driven workflow for managing the entire cloud-native stack, from low-level cloud infrastructure to in-cluster application deployments. This integration is not just a convenience; it's a strategic necessity for building reproducible and scalable systems.
Instead of provisioning a cluster with a cloud provider's Terraform module and then pivoting to kubectl and YAML manifests for application deployment, this approach allows you to define the entire desired state in a single, declarative framework. This creates a cohesive system where infrastructure and application configurations are managed in lockstep.
The Strategic Advantage of a Unified Workflow
Managing modern cloud-native systems involves orchestrating two distinct but interconnected layers. The first is the foundational infrastructure: VPCs, subnets, managed Kubernetes services (EKS, GKE, AKS), and the associated IAM or RBAC permissions. The second is the application layer running within the Kubernetes cluster: Deployments, Services, ConfigMaps, Ingresses, and other API objects.
Employing separate toolchains for these layers (e.g., Terraform for infrastructure, kubectl/Helm for applications) introduces operational friction and creates knowledge silos. Infrastructure teams manage the underlying cloud resources, while development teams handle Kubernetes manifests, leading to coordination overhead and potential mismatches between layers.
Adopting Terraform for both layers breaks down these silos. A consistent syntax (HCL) and a unified state file create a single source of truth, ensuring that the infrastructure and the applications it hosts are always synchronized.
Beyond Simple Provisioning
This integration extends far beyond initial cluster creation; it encompasses the full lifecycle management of your entire technology stack.
Here are the practical, technical benefits:
- Eliminate Configuration Drift: Manual
kubectl patchorkubectl editcommands are a primary source of drift, where the live cluster state deviates from the version-controlled configuration. By managing all Kubernetes resources with Terraform, any out-of-band change is detected on the nextterraform plan, allowing you to revert it and enforce the codified state. - Achieve True Environment Parity: Replicating a production environment for staging or development becomes a deterministic process. A unified Terraform configuration allows you to instantiate an identical clone—including the EKS cluster, its node groups, security groups, and every deployed application manifest—by simply running
terraform applywith a different workspace or.tfvarsfile. This mitigates the "it works on my machine" class of bugs. - Simplify Complex Dependencies: Applications often require external cloud resources like an RDS database or an S3 bucket. Terraform handles the entire dependency graph in a single operation. For example, you can define a
aws_db_instanceresource, create akubernetes_secretwith its credentials, and then deploy akubernetes_deploymentthat mounts that secret—all within oneterraform apply. Terraform's dependency graph ensures these resources are created in the correct order.
This unified approach is the hallmark of a mature Infrastructure as Code practice. You transition from managing individual components to orchestrating cohesive systems. This is one of the core benefits of Infrastructure as Code for any modern DevOps team.
Ultimately, this pairing transforms your system from a collection of disparate components into a single, versioned, and auditable entity. This shift simplifies management, enhances team productivity, and builds a more resilient and predictable application platform.
Building a Professional Workspace
Before writing HCL, establishing a robust, collaborative environment is crucial. This involves more than installing CLIs; it's about architecting a workspace that prevents common pitfalls like state file conflicts, duplicated code, and non-reproducible environments.
The initial step is to configure your local machine with the essential command-line tools. These form the control interface for any IaC operation, enabling seamless interaction with both cloud provider APIs and the Kubernetes API.
- Terraform CLI: The core engine that parses HCL, builds a dependency graph, and executes API calls to create, update, and destroy resources.
- kubectl: The indispensable CLI for direct interaction with the Kubernetes API server for debugging, inspection, and imperative commands once the cluster is provisioned.
- Cloud Provider CLI: The specific CLI for your cloud platform (e.g., AWS CLI, Azure CLI, gcloud CLI) is essential for authenticating Terraform, managing credentials, and performing ad-hoc tasks outside the IaC workflow.
A comprehensive understanding of how these tools fit into the modern tech stack provides the necessary context for building complex, integrated systems.
Configuring a Remote State Backend
The single most critical step for any team-based Terraform project is to immediately abandon local state files. A remote state backend—such as an AWS S3 bucket with a DynamoDB table for locking or Azure Blob Storage—is non-negotiable for any serious Terraform and Kubernetes workflow.
Local state files (terraform.tfstate) are a recipe for disaster in a collaborative setting. A remote backend provides two critical features: shared state access and state locking. Locking prevents multiple engineers from running terraform apply concurrently, which would corrupt the state file and lead to resource conflicts. It establishes a canonical source of truth for your infrastructure's current state.
A shared remote backend is the first and most important habit to adopt. It transforms Terraform from a personal utility into a reliable, team-oriented orchestration tool, preventing dangerous state divergence and enabling collaborative development from day one.
Establishing a Scalable Project Structure
Finally, a logical project structure is vital for long-term maintainability. Avoid a monolithic directory of .tf files. A proven pattern is to logically separate configurations, for example, by environment (dev/, staging/, prod/) or by component (modules/networking/, modules/eks-cluster/, apps/).
This modular approach enhances readability and allows for targeted plan and apply operations. You can modify an application's ConfigMap without needing to evaluate the state of your entire VPC, reducing the blast radius of changes and speeding up development cycles. This separation is a key principle of mature IaC and is foundational for complex, multi-environment deployments.
Provisioning a Kubernetes Cluster with Terraform
Now, let's translate theory into practice by provisioning a production-grade Kubernetes cluster using Infrastructure as Code. The objective is not merely to create a cluster but to define a secure, scalable, and fully declarative configuration that can be versioned and replicated on demand.
While building a cluster on bare metal or VMs is possible, managed Kubernetes services are the industry standard for good reason. They abstract away the complexity of managing the control plane (etcd, API server, scheduler), which is a significant operational burden.
Managed services like EKS, GKE, and AKS dominate the market, accounting for roughly 63% of all Kubernetes instances worldwide as of 2025. They allow engineering teams to focus on application delivery rather than control plane maintenance and etcd backups.
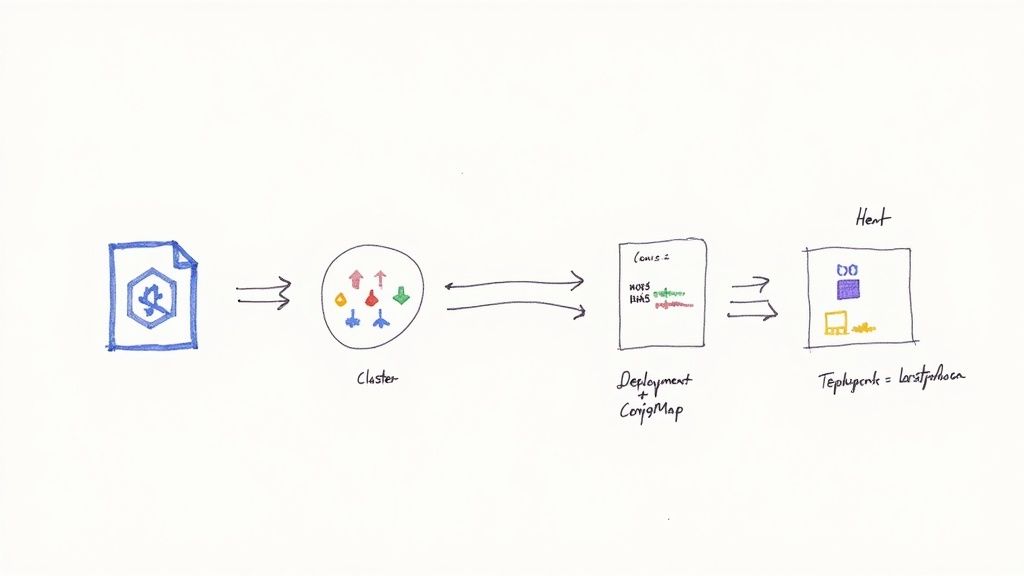
This diagram outlines the foundational workflow for setting up a Terraform project to provision your cluster.

This methodical approach ensures the workspace is correctly configured before defining cloud resources, preventing common setup errors.
Dissecting the Core Infrastructure Components
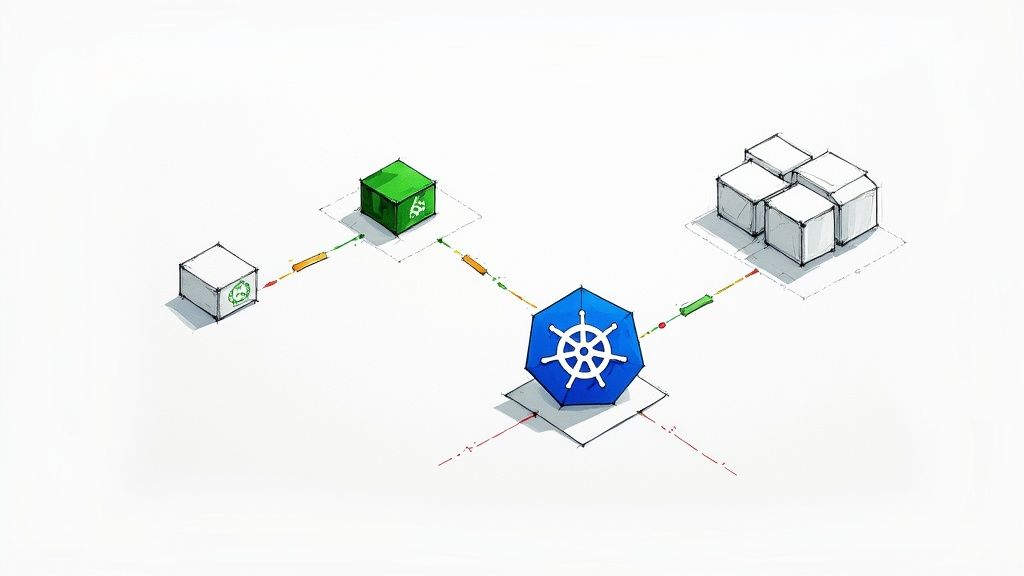
When using Terraform and Kubernetes, the cluster is just one component. First, you must provision its foundational infrastructure, including networking, permissions, and compute resources.
Let's break down the essential building blocks for an EKS cluster on AWS:
The Virtual Private Cloud (VPC) is the cornerstone, providing a logically isolated network environment. Within the VPC, you must define private and public subnets across multiple Availability Zones (AZs) to ensure high availability. This multi-AZ architecture ensures that if one data center experiences an outage, cluster nodes in other AZs can continue operating.
Defining your network with Terraform enables deterministic reproducibility. You codify the entire network topology—subnets, route tables, internet gateways, NAT gateways—ensuring every environment, from dev to production, is built on an identical and secure network foundation.
Next, you must configure Identity and Access Management (IAM) roles. These are critical for security, not an afterthought. The EKS control plane requires an IAM role to manage AWS resources (like Load Balancers), and the worker nodes require a separate role to join the cluster and access other AWS services (like ECR). Hardcoding credentials is a severe security vulnerability; IAM roles provide a secure, auditable mechanism for granting permissions.
Defining Node Groups and Scaling Behavior
With networking and permissions in place, you can define the worker nodes. A common anti-pattern is to create a single, monolithic node group. A better practice is to create multiple node groups (or pools) to isolate different workload types based on their resource requirements.
For instance, you might configure distinct node groups with specific instance types:
- General-purpose nodes (e.g., m5.large): For stateless web servers and APIs.
- Memory-optimized nodes (e.g., r5.large): For in-memory databases or caching layers like Redis.
- GPU-enabled nodes (e.g., g4dn.xlarge): For specialized machine learning or data processing workloads.
This strategy improves resource utilization and prevents a resource-intensive application from impacting critical services. You can enforce workload placement using Kubernetes taints and tolerations, ensuring pods are scheduled onto the appropriate node pool. For a deeper look at operational best practices, you can explore various Kubernetes cluster management tools that complement this IaC approach.
Finally, cluster auto-scaling is non-negotiable for both cost efficiency and resilience. By defining auto-scaling policies in Terraform (using the aws_autoscaling_group resource or the managed eks_node_group block), you empower the cluster to automatically add nodes during demand spikes and remove them during lulls. This dynamic scaling ensures you only pay for the compute you need, creating a cost-effective and resilient system.
Managing Kubernetes Objects with Terraform
With a provisioned Kubernetes cluster, the next step is deploying applications. This is where the synergy of Terraform and Kubernetes becomes truly apparent. You can manage in-cluster resources—Deployments, Services, ConfigMaps—using the same HCL syntax and workflow used to provision the cluster itself.
This capability is enabled by the official Terraform Kubernetes provider. It acts as a bridge, translating your declarative HCL into API calls to the Kubernetes API server, allowing you to manage application state alongside infrastructure state.
This provider-based model is central to Terraform's versatility. The Terraform Registry contains over 3,000 providers, but the ecosystem is highly concentrated. The top 20 providers account for 85% of all downloads, with the Kubernetes provider being a critical component of modern DevOps toolchains. For more context, explore this overview of the most popular Terraform providers.
Configuring the Kubernetes Provider
First, you must configure the provider to authenticate with your cluster. The best practice is to dynamically source authentication credentials from the Terraform resource that created the cluster.
Here is a practical example of configuring the provider to connect to an EKS cluster provisioned in a previous step:
data "aws_eks_cluster" "cluster" {
  name = module.eks.cluster_id
}

data "aws_eks_cluster_auth" "cluster" {
  name = module.eks.cluster_id
}

provider "kubernetes" {
  host                   = data.aws_eks_cluster.cluster.endpoint
  cluster_ca_certificate = base64decode(data.aws_eks_cluster.cluster.certificate_authority.0.data)
  token                  = data.aws_eks_cluster_auth.cluster.token
}
This configuration uses data sources to fetch the cluster's API endpoint, CA certificate, and an authentication token directly from AWS. This approach is superior to hardcoding credentials, as it remains secure and automatically synchronized with the cluster's state.
Mapping Kubernetes Manifests to Terraform Resources
For those accustomed to kubectl apply -f and YAML manifests, the transition to HCL is straightforward. Each Kubernetes API object has a corresponding Terraform resource.
This table provides a mapping between common Kubernetes objects and their Terraform resource types.
| Kubernetes Object (YAML Kind) | Terraform Resource Type | Common Use Case |
|---|---|---|
| Deployment | kubernetes_deployment |
Managing stateless application pods with replicas and rollout strategies. |
| Service | kubernetes_service |
Exposing an application via a stable network endpoint (ClusterIP, NodePort, LoadBalancer). |
| Pod | kubernetes_pod |
Running a single container; generally disfavored in favor of higher-level controllers like Deployments. |
| Namespace | kubernetes_namespace |
Providing a scope for names and logically isolating resource groups within a cluster. |
| ConfigMap | kubernetes_config_map |
Storing non-sensitive configuration data as key-value pairs. |
| Secret | kubernetes_secret |
Storing and managing sensitive data like passwords, tokens, and TLS certificates. |
| Ingress | kubernetes_ingress_v1 |
Managing external L7 access to services in a cluster, typically for HTTP/HTTPS routing. |
| PersistentVolumeClaim | kubernetes_persistent_volume_claim |
Requesting persistent storage for stateful applications. |
These Terraform resources are not just structured representations of YAML; they integrate fully with Terraform's state management, dependency graphing, and variable interpolation capabilities.
Deploying Your First Application
With the provider configured, you can define Kubernetes objects as Terraform resources. Let's deploy a simple NGINX web server, which requires a Deployment to manage the pods and a Service to expose it to traffic.
A kubernetes_deployment resource is a direct HCL representation of its YAML counterpart, with the added benefit of using variables and interpolations.
resource "kubernetes_deployment" "nginx" {
  metadata {
    name = "nginx-deployment"
    labels = {
      app = "nginx"
    }
  }

  spec {
    replicas = 2

    selector {
      match_labels = {
        app = "nginx"
      }
    }

    template {
      metadata {
        labels = {
          app = "nginx"
        }
      }

      spec {
        container {
          image = "nginx:1.21.6"
          name  = "nginx"

          port {
            container_port = 80
          }
        }
      }
    }
  }
}
This block instructs Kubernetes to maintain two replicas of the NGINX container. Next, we expose it with a LoadBalancer Service.
resource "kubernetes_service" "nginx" {
  metadata {
    name = "nginx-service"
  }
  spec {
    selector = {
      app = kubernetes_deployment.nginx.spec.0.template.0.metadata.0.labels.app
    }
    port {
      port        = 80
      target_port = 80
    }
    type = "LoadBalancer"
  }
}
Note the selector block's value: kubernetes_deployment.nginx.spec.0.template.0.metadata.0.labels.app. This is an explicit reference to the label defined in the deployment resource. This creates a dependency in Terraform's graph, ensuring the Service is only created or updated after the Deployment. This is a significant advantage over applying a directory of unordered YAML files.
By managing your Kubernetes manifests with Terraform, you turn your application deployments into version-controlled, state-managed infrastructure components. This simple shift kills configuration drift and makes your entire stack, from cloud resources to running pods, completely reproducible.
Unifying Workflows with the Helm Provider
If your organization already leverages Helm charts for complex applications, you can integrate them directly into your Terraform workflow using the Terraform Helm provider.
Instead of running helm install imperatively, you define a declarative helm_release resource.
provider "helm" {
  kubernetes {
    host                   = data.aws_eks_cluster.cluster.endpoint
    cluster_ca_certificate = base64decode(data.aws_eks_cluster.cluster.certificate_authority.0.data)
    token                  = data.aws_eks_cluster_auth.cluster.token
  }
}

resource "helm_release" "prometheus" {
  name       = "prometheus"
  repository = "https://prometheus-community.github.io/helm-charts"
  chart      = "prometheus"
  namespace  = "monitoring"
  create_namespace = true

  set {
    name  = "server.persistentVolume.enabled"
    value = "false"
  }
}
This approach is extremely powerful. It allows you to manage the lifecycle of a complex application like Prometheus alongside the infrastructure it depends on. Furthermore, you can pass outputs from other Terraform resources (e.g., an RDS endpoint or an IAM role ARN) directly into the Helm chart's values, creating a tightly integrated, end-to-end declarative workflow.
Advanced IaC Patterns and Best Practices
Professional-grade Infrastructure as Code (IaC) moves beyond basic resource definitions to embrace patterns that promote reusability, consistency, and automation. As your Terraform and Kubernetes footprint grows, managing raw HCL files for each environment becomes untenable. The goal is to evolve from writing one-off scripts to engineering a scalable operational framework.
The primary mechanism for achieving this is the Terraform module. A module is a self-contained, reusable package of Terraform configurations that defines a logical piece of infrastructure, such as a standardized VPC or a production-ready EKS cluster.
By authoring and consuming modules, you establish a version-controlled library of vetted infrastructure components. This enforces organizational best practices, drastically reduces code duplication, and accelerates the provisioning of new environments. For a detailed guide, see these Terraform modules best practices.
Managing Multiple Environments
A common challenge is managing multiple environments (e.g., development, staging, production) without configuration drift. Terraform workspaces are the solution. Workspaces allow you to use the same configuration files to manage multiple distinct state files, effectively creating parallel environments.
Combine workspaces with environment-specific .tfvars files for a powerful configuration management pattern. This allows you to inject variables like instance sizes, replica counts, or feature flags at runtime.
A recommended structure includes:
main.tf: Contains the core resource definitions and module calls—the what.variables.tf: Declares all required input variables.terraform.tfvars: Holds default values, suitable for a development environment.production.tfvars: Defines production-specific values (e.g., larger instance types, higher replica counts).
To deploy to production, you execute: terraform workspace select production && terraform apply -var-file="production.tfvars".
Adopting a multi-environment strategy with workspaces and variable files is a non-negotiable best practice. It guarantees the only difference between staging and production is configuration data, not the code itself. This dramatically cuts down the risk of surprise failures during deployments.
Automating with CI/CD Pipelines
To achieve operational excellence, integrate your Terraform workflow into a CI/CD pipeline using tools like GitHub Actions, GitLab CI, or Jenkins. Automating the plan and apply stages removes manual intervention, reduces human error, and creates an immutable, auditable log of all infrastructure changes.
A standard GitOps-style pipeline follows this flow:
- Pull Request: A developer opens a PR with infrastructure changes.
- Automated Plan: The CI tool automatically runs
terraform plan -out=tfplanand posts the output as a comment in the PR. - Peer Review: The team reviews the execution plan to validate the proposed changes.
- Merge and Apply: Upon approval and merge, the pipeline automatically executes
terraform apply "tfplan"against the target environment.
Integrating these practices aligns with broader IT Infrastructure Project Management Strategies, ensuring that infrastructure development follows the same rigorous processes as application development.
Day-Two Operations and Graceful Updates
Advanced IaC addresses "day-two" operations—tasks performed after initial deployment, such as version upgrades. Kubernetes is ubiquitous; as of 2024, over 60% of enterprises use it, and 91% of those are in companies with over 1,000 employees. Managing its lifecycle is critical.
Terraform's lifecycle block provides fine-grained control over resource updates. For example, when upgrading a Kubernetes node pool, using the create_before_destroy = true argument ensures that new nodes are provisioned, healthy, and ready to accept workloads before the old nodes are terminated. This enables zero-downtime node rotations and other critical maintenance tasks, which is essential for maintaining service availability.
Common Terraform and Kubernetes Questions
As you adopt Terraform and Kubernetes, several common questions and patterns emerge. Addressing them proactively can prevent significant architectural challenges.
Here are answers to the most frequently asked questions.
When to Use Terraform Versus Helm
This is best answered by thinking in layers. Use Terraform for the foundational infrastructure: the Kubernetes cluster, its networking (VPC, subnets), and the necessary IAM roles. For deploying applications into the cluster, you have two primary options within the Terraform ecosystem:
- Terraform Kubernetes Provider: Ideal for managing first-party, in-house applications. It maintains a consistent HCL workflow from the cloud provider down to the
kubernetes_deploymentandkubernetes_serviceresources. This provides a single, unified state. - Terraform Helm Provider: The preferred choice for deploying complex, third-party software packaged as Helm charts (e.g., Prometheus, Istio, Argo CD). It allows you to leverage the community-maintained packaging while still managing the release lifecycle declaratively within Terraform.
A hybrid approach is often optimal. Use the native Kubernetes provider for your own application manifests and the Helm provider for off-the-shelf components. This provides the best of both worlds: full control where you need it and powerful abstractions where you don't.
How to Manage Kubernetes Object State
The state of your Kubernetes objects (Deployments, Services, etc.) is stored in the same terraform.tfstate file as your cloud infrastructure resources.
This is precisely why a remote backend (like S3 with DynamoDB locking) is mandatory for team collaboration. It creates a single, canonical source of truth for your entire environment, from the VPC down to the last ConfigMap. It also provides state locking to prevent concurrent apply operations from corrupting the state file.
The Best Way to Handle Kubernetes Secrets
Never hardcode secrets in your HCL files or commit them to version control. This is a critical security anti-pattern.
The correct approach is to integrate a dedicated secrets management solution. Use the appropriate Terraform provider to fetch secrets dynamically at apply time from a system like HashiCorp Vault, AWS Secrets Manager, or Azure Key Vault. Your Terraform configuration will contain data source blocks that reference the secrets, and their values are injected into kubernetes_secret resources during the apply phase. This keeps your codebase secure and portable.
Ready to implement expert-level DevOps practices for your Terraform and Kubernetes workflows? At OpsMoon, we connect you with top-tier engineers who can build, automate, and scale your infrastructure. Start with a free work planning session to create a clear roadmap for your success.