A Technical Guide to Kubernetes on Bare Metal for Peak Performance
 By opsmoon
Discover kubernetes bare metal deployment: architecture, networking, storage, and best practices for high-performance, scalable apps.
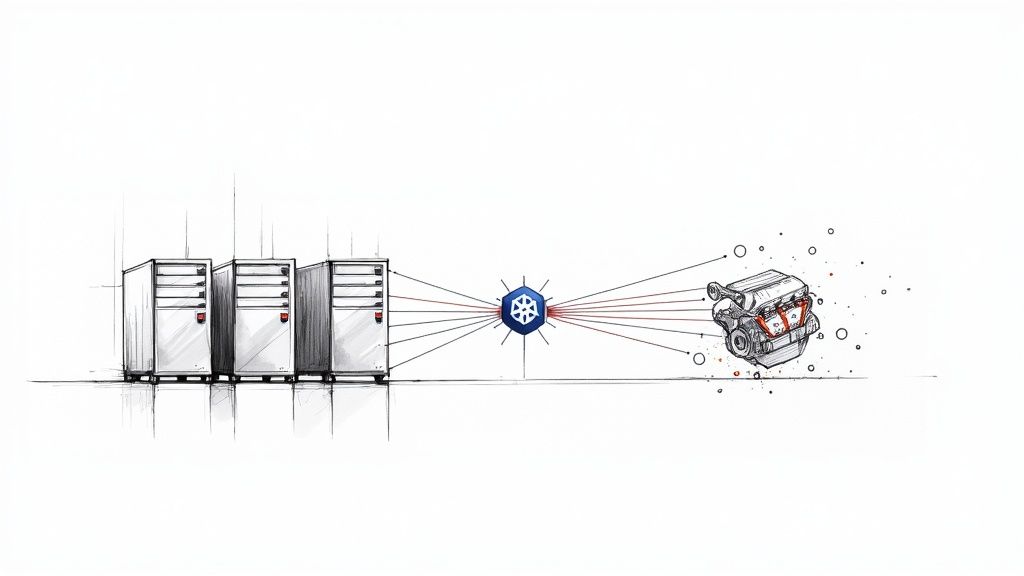
Deploying Kubernetes on bare metal means installing the container orchestrator directly onto physical servers without an intermediary hypervisor layer. This direct hardware access eliminates virtualization overhead, giving applications raw, unfiltered access to the server's compute, memory, I/O, and networking resources.
The result is maximum performance and the lowest possible latency, a critical advantage for high-throughput workloads like databases, message queues, AI/ML training, and high-frequency trading platforms. This guide provides a technical deep-dive into the architecture and operational practices required to build and maintain a production-grade bare metal Kubernetes cluster.
Why Choose Kubernetes on Bare Metal
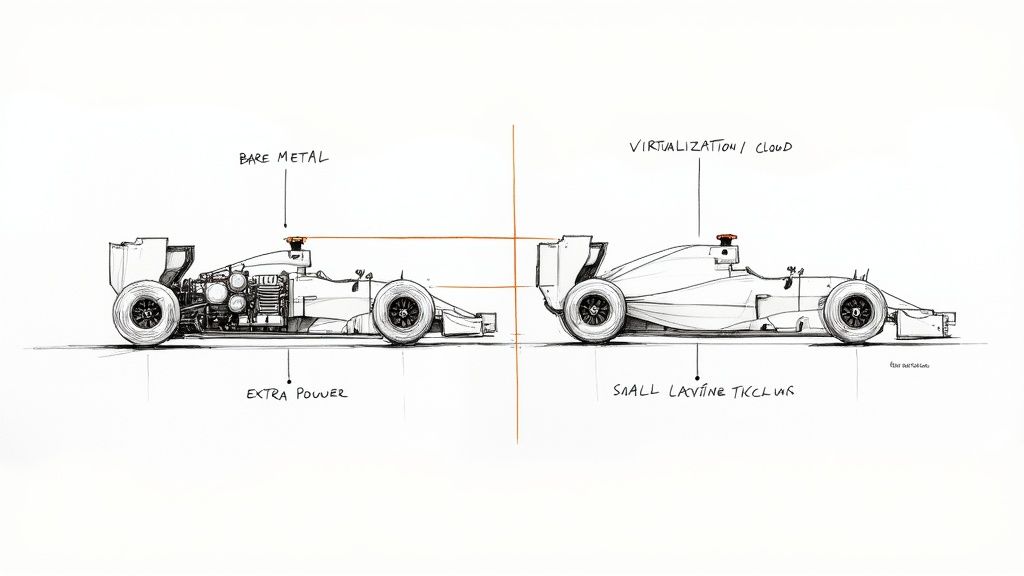
When an engineering team decides where to run their Kubernetes clusters, they're usually weighing three options: cloud-managed services like GKE or EKS, virtualized on-prem environments, or bare metal. Cloud and VMs offer operational convenience, but a Kubernetes bare metal setup is engineered for raw performance.
Think of it as the difference between a production race car and a road-legal supercar. Running Kubernetes on bare metal is like bolting the engine directly to the chassis—every joule of energy translates to speed with zero waste. Virtualization introduces a complex transmission and comfort features; it works, but that abstraction layer consumes resources and introduces I/O latency, measurably degrading raw performance.
To quantify this, here’s a technical breakdown of how these models compare.
Kubernetes Deployment Models at a Glance
| Deployment Model | Performance & Latency | Cost Model | Operational Overhead |
|---|---|---|---|
| Bare Metal | Highest; direct hardware access, no hypervisor tax. | Best for stable workloads (CapEx); predictable TCO. | High; requires deep expertise in hardware, networking, and OS management. |
| Virtualized | Good; ~5-15% CPU/memory overhead from hypervisor. | Moderate; software licensing (e.g., vSphere) adds to CapEx. | Medium; hypervisor abstracts hardware management. |
| Cloud-Managed | Good; provider-dependent, "noisy neighbor" potential. | Lowest for variable workloads (OpEx); pay-as-you-go. | Low; managed by cloud provider. |
This table gives you a starting point, but the "why" behind choosing bare metal goes much deeper.
The Core Drivers for Bare Metal
The decision to eliminate the hypervisor is a strategic one, driven by specific technical and business requirements where performance and control outweigh the convenience of managed services.
The primary technical justifications are:
- Unmatched Performance: Bypassing the hypervisor grants applications direct access to CPU scheduling, physical RAM, and network interface cards (NICs). This slashes I/O latency and eliminates the "hypervisor tax"—the CPU and memory overhead consumed by the virtualization software itself. Workloads that are sensitive to jitter, such as real-time data processing, benefit immensely.
- Predictable Cost Structure: Bare metal shifts infrastructure spending from a variable, operational expense (OpEx) model to a more predictable capital expense (CapEx) model. For stable, long-running workloads, owning the hardware can dramatically lower the Total Cost of Ownership (TCO) compared to the recurring fees of cloud services.
- Complete Infrastructure Control: Self-hosting provides total autonomy over the entire stack. You control server firmware versions, kernel parameters, network topology (e.g., L2/L3 fabric), and storage configurations. This level of control is essential for specialized use cases or strict regulatory compliance.
A Growing Industry Standard
This is no longer a niche strategy. The global developer community has standardized on Kubernetes, with 5.6 million developers now using the platform. As Kubernetes solidifies its position with a massive 92% market share of container orchestration tools, more organizations are turning to bare metal to extract maximum value from their critical applications. Read more about the rise of bare metal Kubernetes adoption.
By removing abstraction layers, a bare metal Kubernetes setup empowers teams to fine-tune every component for maximum efficiency. This level of control is essential for industries like high-frequency trading, real-time data processing, and large-scale AI/ML model training, where every microsecond counts.
Ultimately, choosing a bare metal deployment is about making a deliberate trade-off. You accept greater operational responsibility in exchange for unparalleled performance, cost-efficiency, and total control. This guide will provide the technical details required to build, manage, and scale such an environment.
Designing a Resilient Bare Metal Architecture
Building a resilient Kubernetes bare metal cluster is an exercise in distributed systems engineering. You are not just configuring software; you are designing a fault-tolerant system from the physical layer up. Every decision—from server specifications to control plane topology—directly impacts the stability and performance of the entire platform.
The first step is defining the role of each physical machine. A production Kubernetes cluster consists of two primary node types: control plane nodes, which run the Kubernetes API server, scheduler, and controller manager, and worker nodes, which execute application pods. High availability (HA) is non-negotiable for production, meaning you must eliminate single points of failure.
A minimal production-grade topology consists of three control plane nodes and at least three worker nodes. To achieve true fault tolerance, these servers must be distributed across different physical failure domains: separate server racks, power distribution units (PDUs), and top-of-rack (ToR) switches. This ensures that the failure of a single physical component does not cause a cascading cluster outage.
Control Plane and etcd Topology
A critical architectural decision is the placement of etcd, the consistent and highly-available key-value store that holds all Kubernetes cluster state. If etcd loses quorum, your cluster is non-functional. For HA, there are two primary topologies.
- Stacked Control Plane (etcd on control plane nodes): This is the most common and resource-efficient approach. The etcd members run directly on the same machines as the Kubernetes control plane components. It's simpler to configure and requires fewer servers.
- External etcd Cluster (etcd on dedicated nodes): In this model, etcd is deployed on a dedicated cluster of servers, completely separate from the Kubernetes control plane. While it requires more hardware and operational complexity, it provides maximum isolation. An issue on an API server (e.g., a memory leak) cannot impact etcd performance, and vice-versa.
For most bare metal deployments, a stacked control plane offers the best balance of resilience and operational simplicity. However, for extremely large-scale or mission-critical clusters where maximum component isolation is paramount, an external etcd cluster provides an additional layer of fault tolerance.
Sizing Your Bare Metal Nodes
Hardware selection must be tailored to the specific role each node will play. A generic server specification is insufficient for a high-performance cluster. The hardware profile must match the workload.
Here is a baseline technical specification guide for different node roles.
| Node Type | Workload Example | CPU Recommendation | RAM Recommendation | Storage Recommendation |
|---|---|---|---|---|
| Control Plane | Kubernetes API, etcd | 8-16 Cores | 32-64 GB DDR4/5 | Critical: High IOPS, low-latency NVMe SSDs for etcd data directory (/var/lib/etcd) |
| Worker (General) | Web Apps, APIs | 16-32 Cores | 64-128 GB | Mixed SSD/NVMe for fast container image pulls and local storage |
| Worker (Compute) | AI/ML, Data Proc. | 64+ Cores (w/ GPU) | 256-512+ GB | High-throughput RAID 0 NVMe array for scratch space |
| Worker (Storage) | Distributed DBs (e.g., Ceph) | 32-64 Cores | 128-256 GB | Multiple large capacity NVMe/SSDs for distributed storage pool |
These specifications are not arbitrary. A control plane node's performance is bottlenecked by etcd's disk I/O. A 2023 industry survey found that over 45% of performance issues in self-managed clusters were traced directly to insufficient I/O performance for the etcd data store. Using enterprise-grade NVMe drives for etcd is a hard requirement for production.
When you thoughtfully plan out your node roles and etcd layout, you're not just racking servers—you're building a cohesive, fault-tolerant platform. This upfront design work pays off massively down the road by preventing cascading failures and making it way easier to scale. It’s the true bedrock of a solid bare metal strategy.
Solving Bare Metal Networking Challenges
In a cloud environment, networking is highly abstracted. Requesting a LoadBalancer service results in the cloud provider provisioning and configuring an external load balancer automatically.
On bare metal Kubernetes, this abstraction vanishes. You are responsible for the entire network stack, from the physical switches and routing protocols to the pod-to-pod communication overlay.
This control is a primary reason for choosing bare metal, but it necessitates a robust networking strategy. You must select, configure, and manage two key components: a load balancing solution for north-south traffic (external to internal) and a Container Network Interface (CNI) plugin for east-west traffic (pod-to-pod).
This diagram shows how the control plane, worker nodes, and etcd form the core of a resilient bare metal setup. Your networking layer is the glue that holds all of this together.
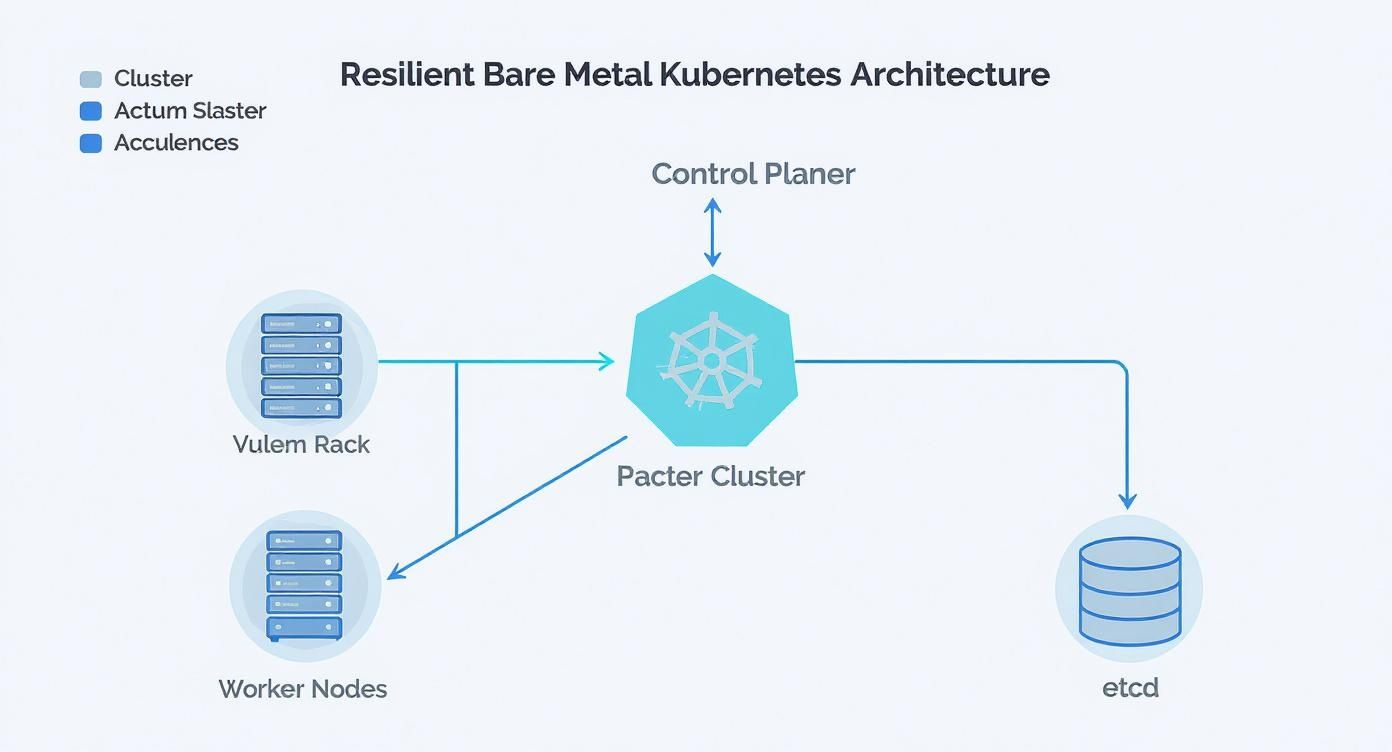
You can see how each piece has a distinct role, which underscores just how critical it is to have a networking fabric that reliably connects them all.
Exposing Services with MetalLB
To replicate the functionality of a cloud LoadBalancer service on-premises, MetalLB has become the de facto standard. It integrates with your physical network to assign external IP addresses to Kubernetes services from a predefined pool.
MetalLB operates in two primary modes:
-
Layer 2 (L2) Mode: The simplest configuration. A single node in the cluster announces the service IP address on the local network using Address Resolution Protocol (ARP). If that node fails, another node takes over the announcement. While simple, it creates a performance bottleneck as all traffic for that service is funneled through the single leader node. It is suitable for development or low-throughput services.
-
BGP Mode: The production-grade solution. MetalLB establishes a Border Gateway Protocol (BGP) peering session with your physical network routers (e.g., ToR switches). This allows MetalLB to advertise the service IP to the routers, which can then use Equal-Cost Multi-Path (ECMP) routing to load-balance traffic across multiple nodes running the service pods. This provides true high availability and scalability, eliminating single points of failure.
The choice between L2 and BGP is a choice between simplicity and production-readiness. L2 is excellent for lab environments. For any production workload, implementing BGP is essential to achieve the performance and fault tolerance expected from a bare metal deployment.
Selecting the Right CNI Plugin
While MetalLB handles external traffic, the Container Network Interface (CNI) plugin manages pod-to-pod networking within the cluster. CNI choice is critical to performance, with bare metal clusters often achieving network latency up to three times lower than typical virtualized environments.
Here is a technical comparison of leading CNI plugins:
| CNI Plugin | Key Technology | Best For |
|---|---|---|
| Calico | BGP for routing, iptables/eBPF for policy | Performance-critical applications and secure environments requiring granular network policies. Its native BGP mode integrates seamlessly with MetalLB for a unified routing plane. |
| Cilium | eBPF (extended Berkeley Packet Filter) | Modern, high-performance clusters requiring deep network observability, API-aware security, and service mesh capabilities without a sidecar. |
| Flannel | VXLAN overlay | Simple, quick-start deployments where advanced network policies are not an immediate requirement. It's easy to configure but introduces encapsulation overhead. |
For most high-performance bare metal clusters, Calico is an excellent choice due to its direct BGP integration. However, Cilium is rapidly gaining traction by leveraging eBPF to implement networking, observability, and security directly in the Linux kernel, bypassing slower legacy paths like iptables for superior performance. To see how these ideas play out in other parts of the ecosystem, check out our deep dive on service meshes like Linkerd vs Istio.
Mastering Storage for Stateful Applications

Stateless applications are simple, but business-critical workloads—databases, message queues, AI/ML models—are stateful. They require persistent storage that outlives any individual pod. On Kubernetes on bare metal, you cannot provision a block storage volume with a simple API call; you must engineer a robust storage solution yourself.
The Container Storage Interface (CSI) is the standard API that decouples Kubernetes from specific storage systems. It acts as a universal translation layer, allowing Kubernetes to provision, attach, and manage volumes from any CSI-compliant storage backend, whether it's a local NVMe drive or a distributed filesystem.
The Role of PersistentVolumes and Claims
Storage is exposed to applications through two core Kubernetes objects:
- PersistentVolume (PV): A cluster-level resource representing a piece of physical storage. It is provisioned by an administrator or dynamically by a CSI driver.
- PersistentVolumeClaim (PVC): A namespaced request for storage by a pod. A developer can request
spec.resources.requests.storage: 10Giwith a specificstorageClassNamewithout needing to know the underlying storage technology.
The CSI driver acts as the controller that satisfies a PVC by provisioning a PV from its backend storage pool. This process, known as "dynamic provisioning," is essential for scalable, automated storage management.
Choosing Your Bare Metal Storage Strategy
Your storage architecture directly impacts application performance, resilience, and scalability. There are two primary strategies, each suited for different workload profiles.
The optimal storage solution is not one-size-fits-all. It's about matching the storage technology's performance and resilience characteristics to the specific I/O requirements of the application.
1. Local Storage for Maximum Performance
For workloads where latency is the primary concern, nothing surpasses direct-attached local storage (NVMe or SSD).
The Local Path Provisioner is a lightweight CSI driver that exposes host directories as storage. It's simple, fast, and provides direct access to the underlying drive's performance. When a PVC is created, the provisioner finds a node with sufficient capacity and binds the PVC to a PV representing a path on that node's filesystem (e.g., /mnt/disks/ssd1/pvc-xyz).
The trade-off is that the data is tied to a single node. If the node fails, the data is lost. This makes local storage ideal for replicated databases (where the application handles redundancy), cache servers, or CI/CD build jobs.
2. Distributed Storage for Resilience and Scale
For mission-critical stateful applications that cannot tolerate data loss, a distributed storage system is required. These solutions pool the storage from multiple nodes into a single, fault-tolerant, software-defined storage layer.
Two leading open-source options are:
- Rook with Ceph: Rook is a Kubernetes operator that automates the deployment and management of Ceph, a powerful, scalable, and versatile distributed storage system. Ceph can provide block storage (RBD), object storage (S3/Swift compatible), and filesystems (CephFS) from a single unified cluster.
- Longhorn: Developed by Rancher, Longhorn offers a more user-friendly approach to distributed block storage. It automatically replicates volume data across multiple nodes. If a node fails, Longhorn automatically re-replicates the data to a healthy node, ensuring data availability for the application.
These systems provide data redundancy at the cost of increased network latency due to data replication. They are the standard for databases, message brokers, and any stateful service where data durability is non-negotiable.
Choosing Your Cluster Installer and Provisioner
Bootstrapping a Kubernetes bare metal cluster from scratch is a complex process involving OS installation, package configuration, certificate generation, and component setup on every server.
An ecosystem of installers and provisioners has emerged to automate this process. Your choice of tool will fundamentally shape your cluster's architecture, security posture, and day-to-day operational model. The decision balances flexibility and control against operational simplicity and production-readiness.
Foundational Flexibility with Kubeadm
kubeadm is the official cluster installation toolkit from the Kubernetes project. It is not a complete provisioning solution; it does not install the OS or configure the underlying hardware. Instead, it provides a set of robust command-line tools (kubeadm init, kubeadm join) to bootstrap a best-practice Kubernetes cluster on pre-configured machines.
Kubeadm offers maximum flexibility, allowing you to choose your own container runtime, CNI plugin, and other components.
- Pro: Complete control over every cluster component and configuration parameter.
- Con: You are responsible for all prerequisite tasks, including OS hardening, certificate management, and developing the automation to provision the servers themselves.
This path requires significant in-house expertise and is best suited for teams building a highly customized Kubernetes platform.
Opinionated Distributions for Production Readiness
For a more streamlined path to a production-ready cluster, opinionated distributions bundle Kubernetes with pre-configured, hardened components. They trade some flexibility for enhanced security and operational simplicity out-of-the-box.
These distributions are complete Kubernetes platforms, not just installers. They make critical architectural decisions for you, such as selecting a FIPS-compliant container runtime or implementing a CIS-hardened OS, to deliver a production-grade system from day one.
Choosing the right distribution depends on your specific requirements for security, ease of use, or infrastructure immutability.
Comparison of Bare Metal Kubernetes Installers
This table compares popular tools for bootstrapping and managing Kubernetes clusters on bare metal infrastructure, focusing on key decision-making criteria.
| Tool | Primary Use Case | Configuration Method | Security Focus | Ease of Use |
|---|---|---|---|---|
| Kubeadm | Foundational, flexible cluster creation for teams wanting deep control. | Command-line flags and YAML configuration files. | Follows Kubernetes best practices but relies on user for hardening. | Moderate; requires significant manual setup for OS and infra. |
| RKE2 | High-security, compliant environments (e.g., government, finance). | Simple YAML configuration file. | FIPS 140-2 validated, CIS hardened by default. | High; designed for simplicity and operational ease. |
| k0s | Lightweight, zero-dependency clusters that are easy to distribute and embed. | Single YAML file or command-line flags. | Secure defaults, with options for FIPS compliance. | Very High; packaged as a single binary for ultimate simplicity. |
| Talos | Immutable, API-managed infrastructure for GitOps-centric teams. | Declarative YAML managed via an API. | Minimalist, read-only OS; removes SSH and console access. | High, but requires a steep learning curve for its unique model. |
RKE2 and k0s provide a traditional system administration experience. Talos represents a paradigm shift, enforcing an immutable, API-driven GitOps model for managing the entire node, not just the Kubernetes layer.
Declarative Provisioning with Cluster API
After initial installation, you need a way to manage the lifecycle of the physical servers themselves. Cluster API (CAPI) is a Kubernetes sub-project that extends the Kubernetes API to manage cluster infrastructure declaratively.
Using a provider like Metal³, CAPI can automate the entire physical server lifecycle: provisioning the OS via PXE boot, installing Kubernetes components, and joining the machine to a cluster. This enables a true GitOps workflow for bare metal. Your entire data center can be defined in YAML files, version-controlled in Git, and reconciled by Kubernetes controllers. For more on this pattern, see our guide on using Terraform with Kubernetes.
Automating Day-Two Operations and Scaling
Provisioning a Kubernetes bare metal cluster is Day One. The real engineering challenge is Day Two: the ongoing management, maintenance, and scaling of the cluster.
Unlike managed cloud services, where these tasks are handled by the provider, a bare metal environment places 100% of this responsibility on your team. Robust automation is not a luxury; it is a requirement for operational stability.
The Day-Two Operations Playbook
A successful Day-Two strategy relies on an automated playbook for routine and emergency procedures. Manual intervention should be the exception, not the rule.
Your operational runbook must include automated procedures for:
- Node Maintenance: To perform hardware maintenance or an OS upgrade on a node, the process must be automated:
kubectl cordon <node-name>to mark the node unschedulable, followed bykubectl drain <node-name> --ignore-daemonsetsto gracefully evict pods. - Certificate Rotation: Kubernetes components communicate using TLS certificates that expire. Automated certificate rotation using a tool like
cert-manageris critical to prevent a self-inflicted cluster outage. - Kubernetes Version Upgrades: Upgrading a cluster is a multi-step process. Automation scripts should handle a rolling upgrade: first the control plane nodes, one at a time, followed by the worker nodes, ensuring application availability throughout the process.
A well-rehearsed Day-Two playbook turns infrastructure management from a reactive, stressful firefight into a predictable, controlled process. This is the hallmark of a mature bare metal Kubernetes operation.
Strategies for Scaling Your Cluster
As application load increases, your cluster must scale. On bare metal, this involves a combination of hardware and software changes.
Horizontal scaling (adding more nodes) is the primary method for increasing cluster capacity and resilience. Tools like the Cluster API (CAPI) are transformative here, enabling the automated provisioning of new physical servers via PXE boot and their seamless integration into the cluster.
Vertical scaling (adding CPU, RAM, or storage to existing nodes) is less common and more disruptive. It is typically reserved for specialized workloads, such as large databases, that require a massive resource footprint on a single machine.
For a deeper understanding of workload scaling, our guide on autoscaling in Kubernetes covers concepts that apply to any environment.
Full-Stack Observability is Non-Negotiable
On bare metal, you are responsible for monitoring the entire stack, from hardware health to application performance. A comprehensive observability platform is essential for proactive maintenance and rapid incident response.
Your monitoring stack must collect telemetry from multiple layers:
- Hardware Metrics: CPU temperatures, fan speeds, power supply status, and disk health (S.M.A.R.T. data). The
node_exportercan expose these metrics to Prometheus via specialized collectors. - Cluster Metrics: Kubernetes API server health, node status, pod lifecycle events, and resource utilization. The Prometheus Operator is the industry standard for collecting these metrics.
- Application Logs: A centralized logging solution is critical for debugging. A common stack is Loki for log aggregation, Grafana for visualization, and Promtail as the log collection agent on each node.
The power lies in correlating these data sources in a unified dashboard (e.g., Grafana). This allows you to trace a high application latency metric back to a high I/O wait time on a specific worker node, which in turn correlates with a failing NVMe drive reported by the hardware exporter.
Common Questions About Kubernetes on Bare Metal
Even with a well-defined strategy, deploying Kubernetes bare metal raises critical questions. Here are technical answers to common concerns from engineering leaders.
Is Kubernetes on Bare Metal More Secure?
It can be, but security becomes your direct responsibility. By removing the hypervisor, you eliminate an entire attack surface and the risk of VM escape vulnerabilities. However, you also lose the isolation boundary it provides.
This means your team is solely responsible for:
- Host OS Hardening: Applying security benchmarks like CIS to the underlying Linux operating system.
- Physical Security: Securing access to the data center and server hardware.
- Network Segmentation: Implementing granular network policies using tools like Calico or Cilium to control pod-to-pod communication at the kernel level.
With bare metal, there's no cloud provider's abstraction layer acting as a safety net. Your team is directly managing pod security standards and host-level protections—a job that's often partially handled for you in the cloud.
What Is the Biggest Operational Challenge?
Automating Day-Two operations. This includes OS patching, firmware updates on hardware components (NICs, RAID controllers), replacing failed disks, and executing cluster upgrades without downtime.
These are complex, physical tasks that cloud providers abstract away entirely. Success on bare metal depends on building robust, idempotent automation for this entire infrastructure lifecycle. Your team must possess deep expertise in both systems administration and software engineering to build and maintain this automation.
When Should I Avoid a Bare Metal Deployment?
There are clear contraindications for a bare metal deployment:
- Lack of Infrastructure Expertise: If your team lacks deep experience in Linux administration, networking, and hardware management, the operational burden will be overwhelming.
- Highly Elastic Workloads: If your workloads require rapid, unpredictable scaling (e.g., scaling from 10 to 1000 nodes in minutes), the elasticity of a public cloud is a better fit than the physical process of procuring and racking new servers.
- Time-to-Market is the Sole Priority: If speed of initial deployment outweighs long-term performance and cost considerations, a managed Kubernetes service (EKS, GKE, AKS) provides a significantly faster path to a running cluster.
Navigating a bare metal Kubernetes deployment is no small feat; it demands specialized expertise. OpsMoon connects you with the top 0.7% of global DevOps talent to build infrastructure for peak performance, resilience, and scale. Plan your project with a free work planning session today.