How to Configure Reverse Proxy in Nginx & Apache: A Technical Guide
 By opsmoon
Learn how to configure a reverse proxy with our step-by-step guide. Discover tips for Nginx and Apache setup to boost security and performance.

Configuring a reverse proxy involves setting up a dedicated server, typically running software like Nginx or Apache, to act as an intermediary for your web application. It intercepts all incoming user requests from the internet and forwards them to the appropriate backend server responsible for processing the request. This is a foundational component of any robust and scalable https://opsmoon.com/blog/web-application-architecture.
Reverse Proxy Functionality and Use Cases
Before diving into configuration files and directives, it is critical to understand the why. A reverse proxy functions as a gateway for your application's network traffic. It sits between the public internet and your private backend infrastructure, managing every inbound request.
This architectural pattern is fundamental for modern applications. Instead of exposing multiple backend services directly to the internet—a significant security vulnerability—you expose a single, hardened reverse proxy. This creates a powerful abstraction layer, obscuring your internal network topology and shielding your application servers from direct attacks. A solid understanding of basic network concepts is essential for effective implementation.
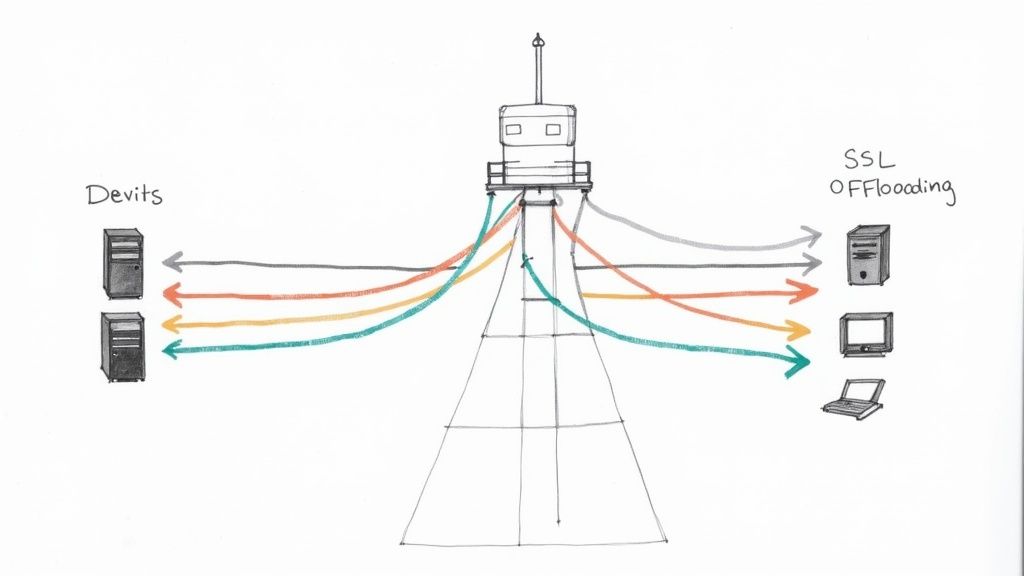
Core Functions and Real-World Benefits
A reverse proxy's responsibilities translate directly into tangible improvements in application performance, security, and scalability.
Let's break down its key functions into a technical overview.
Core Functions of a Reverse Proxy
| Function | Primary Benefit | Common Use Case |
|---|---|---|
| Load Balancing | Prevents server overload and improves uptime. | Distributing user requests evenly across a pool of identical web servers. |
| SSL/TLS Termination | Boosts backend server performance. | Offloading the intensive work of encrypting and decrypting HTTPS traffic. |
| Content Caching | Delivers faster page loads for users. | Storing and quickly serving static files like images, CSS, and JavaScript. |
| Security & Anonymity | Shields backend servers from direct attacks. | Hiding internal server IPs and blocking malicious requests at the network edge. |
These functions are not minor optimizations; they are fundamental to building high-availability, secure applications.
The market reflects this importance. The global reverse proxy software market was valued at USD 1.89 billion in 2024 and is on track to hit USD 5.32 billion by 2033. This growth highlights the technology's critical role in modern web infrastructure.
A reverse proxy is not merely another piece of infrastructure; it is a strategic control plane. It is the component that ensures application availability, performance, and security under load.
Preparing Your Server Environment
Before modifying any configuration files, a systematic preparation of the server environment is required to prevent common deployment failures. This pre-flight check ensures that the foundational networking and security prerequisites are met.
First, you must have secure shell (SSH) access to the server designated for the reverse proxy. Administrative privileges—either sudo access or a root user account—are mandatory for software installation, service management, and modification of network configurations.
Next, verify that your backend application is operational and listening on its designated port. You must be able to establish a connection to it from the proxy server itself. Use a tool like curl or netcat from the proxy server to test connectivity to the application server's IP and port (e.g., curl http://<backend_ip>:<backend_port>). This simple test validates the internal network path.
Foundational Network and Security Checks
Once server access and application readiness are confirmed, configure the necessary network and security settings. These steps ensure traffic can reach the proxy and be securely forwarded to the backend.
This infographic breaks down the key stages of preparation.
The workflow is logical: secure administrative access, configure firewall rules, and prepare for TLS encryption.
A critical component is the firewall configuration. You must create rules to allow inbound TCP traffic on standard web ports: port 80 for HTTP and port 443 for HTTPS. On a Linux system using ufw, the commands would be sudo ufw allow 'Nginx Full' or sudo ufw allow 80/tcp and sudo ufw allow 443/tcp. Without these rules, the proxy is unreachable from the internet.
Finally, procure and position your SSL/TLS certificates. HTTPS is a non-negotiable standard. You will need the certificate file (.crt or .pem) and its corresponding private key (.key). Ensure these files are present on the proxy server with appropriate permissions (e.g., readable only by the root user and the web server's user group) to facilitate a smooth setup.
A common point of failure is neglecting internal firewall rules between the proxy and backend servers. While ports 80 and 443 may be open externally, if the proxy server cannot communicate with the application server on its listening port (e.g., 3000, 8080), the entire configuration will fail.
Setting Up Nginx as a High-Performance Reverse Proxy
For reverse proxy implementations, Nginx is a leading choice due to its event-driven, asynchronous architecture, which enables it to handle high connection volumes with minimal resource consumption. It is renowned for its speed, efficiency, and stability.
This section provides a practical, step-by-step guide to building a production-ready Nginx configuration.
Getting Nginx Ready to Go
First, install Nginx on your server. For Debian-based systems like Ubuntu, use the package manager: sudo apt-get update && sudo apt-get install nginx. After installation, verify that the service is running with sudo systemctl status nginx.
Nginx’s configuration files are located in /etc/nginx/. The best practice is to avoid modifying the main nginx.conf file directly. Instead, create a separate configuration file for each site or application in the /etc/nginx/sites-available/ directory. This modular approach enhances maintainability.
Crafting Your First Server Block
In Nginx terminology, a server block defines the configuration for a virtual server that handles requests for a specific domain. Create a new file in /etc/nginx/sites-available/, for example your_domain.conf, to contain the directives for proxying requests to your backend service.
Consider a common scenario: a Node.js application is running on localhost and listening on port 3000. The objective is to configure Nginx to listen for public traffic on port 80 and forward it to this application.
Here is a commented configuration block that achieves this.
# This block defines the virtual server for our application.
server {
    # Nginx will listen for incoming HTTP connections on port 80.
    listen 80;
    listen [::]:80; # Also listen on IPv6

    # This tells Nginx which domain(s) this server block applies to.
    server_name your_domain.com www.your_domain.com;

    # This 'location' block matches all incoming requests ('/').
    location / {
        # This directive forwards the request to our backend app.
        proxy_pass http://127.0.0.1:3000;

        # These headers are crucial. They pass the original
        # request information to the backend application.
        proxy_set_header Host $host;
        proxy_set_header X-Real-IP $remote_addr;
        proxy_set_header X-Forwarded-For $proxy_add_x_forwarded_for;
        proxy_set_header X-Forwarded-Proto $scheme;
    }
}
The proxy_pass directive is the core of the configuration; it specifies the address of the backend service. The proxy_set_header directives are equally critical. Without them, your backend application would see all requests as originating from 127.0.0.1 (Nginx itself), losing vital client information such as the original IP address.
Pro Tip: A classic beginner mistake is forgetting
proxy_set_header Host $host;. Many web frameworks rely on theHostheader to generate correct URLs or route requests properly. Omitting it can cause all sorts of strange and hard-to-debug issues, even if traffic seems to be flowing.
Putting Your Configuration into Action
After saving the configuration file, you must enable it. Nginx uses a system of symbolic links for this purpose. Create a symlink from your file in sites-available to the sites-enabled directory using this command: sudo ln -s /etc/nginx/sites-available/your_domain.conf /etc/nginx/sites-enabled/.
Before applying the changes, always validate your configuration syntax: sudo nginx -t. A successful test will return a message indicating the syntax is okay. If the test passes, reload the Nginx service to apply the new configuration without dropping existing connections: sudo systemctl reload nginx.
This process of mapping ports and forwarding headers is fundamental to a secure and scalable infrastructure. It’s no surprise that the IT and telecommunications sectors are projected to account for over 30% of global proxy server service revenue by 2025, according to a market analysis by Verified Market Reports. These industries rely on precisely this kind of setup to manage massive volumes of secure traffic.
A reverse proxy does more than just forward traffic; it can also distribute it across multiple backend servers. This is where it evolves into a load balancer. If you’re looking to scale your application, you should explore our detailed guide on load balancing configuration to learn about more advanced setups.
Setting Up Apache as a Flexible Reverse Proxy
While Nginx is often highlighted for raw performance, the Apache HTTP Server remains a powerful and highly versatile choice for a reverse proxy. For teams with existing expertise in Apache, leveraging it for proxying is an efficient and logical choice.
Apache's strength lies in its modular architecture. Reverse proxy functionality is primarily handled by mod_proxy and its associated modules, such as mod_proxy_http. This is a mature and extensively battle-tested feature set.
Getting the Essential Apache Modules Enabled
Before configuring the proxy, you must enable the required modules. Apache's design allows you to load only the necessary components. For a basic reverse proxy, mod_proxy and mod_proxy_http are essential.
On Debian-based systems like Ubuntu, use the a2enmod utility to enable them. Execute the following commands in your terminal to create the necessary symbolic links:
sudo a2enmod proxysudo a2enmod proxy_http
After enabling the modules, reload the Apache service to activate them: sudo systemctl reload apache2. You now have the necessary directives available for configuration.
Building Your VirtualHost Configuration
In Apache, VirtualHost blocks are used to define configurations for different domains, analogous to Nginx's server blocks. All reverse proxy logic for a specific domain should be encapsulated within one of these blocks.
Let's configure a common scenario: a Python or Node.js application is running locally on port 8080. The objective is to configure Apache to listen on port 80 for your_domain.com and forward traffic to this application.
Here is a standard VirtualHost configuration. This should be saved in a new file, such as your_domain.com.conf, within the /etc/apache2/sites-available/ directory.
<VirtualHost *:80>
    ServerName your_domain.com
    ServerAlias www.your_domain.com

    # This is the core of the proxy. It maps all requests ('/')
    # to your backend application.
    ProxyPass / http://127.0.0.1:8080/

    # This directive rewrites response headers from the backend
    # to ensure redirects point to the proxy, not the internal app.
    ProxyPassReverse / http://127.0.0.1:8080/

    # A critical setting for apps that depend on the Host header.
    ProxyPreserveHost On

    # Standard logging is essential for debugging and monitoring.
    ErrorLog ${APACHE_LOG_DIR}/your_domain-error.log
    CustomLog ${APACHE_LOG_DIR}/your_domain-access.log combined
</VirtualHost>
The ProxyPass and ProxyPassReverse directives work in tandem. ProxyPass forwards the client's request to the backend application. ProxyPassReverse intercepts HTTP redirect responses from the backend and rewrites the Location header to match the public-facing domain. This prevents clients from being redirected to an internal address like 127.0.0.1:8080, which would fail.
ProxyPreserveHost Onis a small setting that solves big headaches. Without it, Apache would pass its own internal hostname (likelocalhost) in theHostheader to your backend. This can completely break applications that use theHostheader to generate URLs or serve different content, leading to some very confusing bugs.
After saving your new configuration file, enable the site with sudo a2ensite your_domain.com.conf. Always test the configuration syntax before reloading: sudo apache2ctl configtest. If the test is successful, apply the changes with sudo systemctl reload apache2.
Hardening and Optimizing Your Reverse Proxy
A basic reverse proxy forwards traffic; a production-ready one hardens, accelerates, and protects your applications. This involves offloading TLS encryption, injecting security headers, and implementing intelligent caching strategies.
By mid-2025, it's projected that around 17 million active websites will be sitting behind a reverse proxy. You can track the reverse proxy market share on W3Techs to see the trend. A properly tuned and secured proxy is a competitive necessity.
Implementing SSL and TLS Termination
A primary benefit of a reverse proxy is SSL/TLS termination. Instead of each backend server handling the CPU-intensive process of encrypting and decrypting HTTPS traffic, the proxy handles it centrally at the network edge.
This simplifies infrastructure management significantly. Certificate installation and renewal are centralized on the proxy server. If the proxy and backend servers communicate over a secure private network, the internal traffic can be unencrypted HTTP, reducing processing overhead on the application servers.
Bolstering Security with HTTP Headers
The reverse proxy is the ideal control point for enforcing security policies by adding HTTP headers to every outbound response. These headers instruct the browser on how to behave, mitigating common attack vectors.
Implement these headers in your proxy configuration as a baseline security measure:
- HTTP Strict Transport Security (HSTS): Instructs browsers to communicate with your server exclusively over HTTPS. Add
add_header Strict-Transport-Security "max-age=31536000; includeSubDomains" always;to your Nginx config. - X-Frame-Options: Prevents your site from being embedded in an
<iframe>, defending against clickjacking. Useadd_header X-Frame-Options "SAMEORIGIN" always;. - Content-Security-Policy (CSP): Provides granular control over which resources (scripts, styles, images) a browser is permitted to load, drastically reducing the risk of Cross-Site Scripting (XSS). An example is
add_header Content-Security-Policy "default-src 'self'; script-src 'self' https://trusted.cdn.com;".
Implementing these is a cornerstone of a defense-in-depth strategy. A hardened proxy is your first line of defense against threats like Distributed Denial of Service (DDoS) attacks.
I’ve seen setups where a simple HSTS header could have prevented a major security incident. It's a single line in your Nginx or Apache config that provides an enormous security benefit with almost no performance cost.
Boosting Performance with Caching
A reverse proxy can dramatically improve application performance by caching static content. Assets like images, CSS files, and JavaScript bundles change infrequently, so serving them from application servers on every request is inefficient.
Configure your proxy to identify these assets by file extension or URL path and store a local copy. Subsequent requests for the same asset are served directly from the proxy's cache (memory or disk), bypassing the backend entirely. This reduces latency for the end-user and decreases the load on your application servers.
For a deeper look into building security into your entire workflow, check out our guide on DevOps security best practices.
Answering Common Reverse Proxy Questions
Even with precise technical guides, real-world implementations present unique challenges. Here are answers to common questions encountered by developers and system administrators.
Forward vs. Reverse Proxy: What’s the Difference?
The distinction between forward and reverse proxies is fundamental. They operate at opposite ends of a network connection and solve different problems.
A forward proxy operates on behalf of the client. It is positioned in front of client machines (e.g., on a corporate network). When a user requests an external resource, the request is sent to the forward proxy, which then forwards it to the internet. Its primary purpose is to manage and secure outbound traffic.
A reverse proxy operates on behalf of the server. It is positioned in front of web servers, intercepting all inbound requests from the internet. Its function is to distribute this traffic to the appropriate backend server, enabling load balancing, SSL termination, and infrastructure protection.
The easiest way I've found to remember the difference is to ask: "Whose identity is being hidden?" A forward proxy hides the client's identity. A reverse proxy hides the server's identity.
Can One Proxy Handle Multiple Domains?
Yes, this is a core capability and a primary use case. A single Nginx or Apache instance can manage traffic for numerous different websites or microservices, each potentially hosted on separate backend servers.
This is achieved through name-based virtual hosting. The reverse proxy inspects the Host header of each incoming HTTP request to determine the intended domain. It then matches this domain to the corresponding server block (Nginx) or VirtualHost block (Apache) in its configuration and routes the request to the correct backend service.
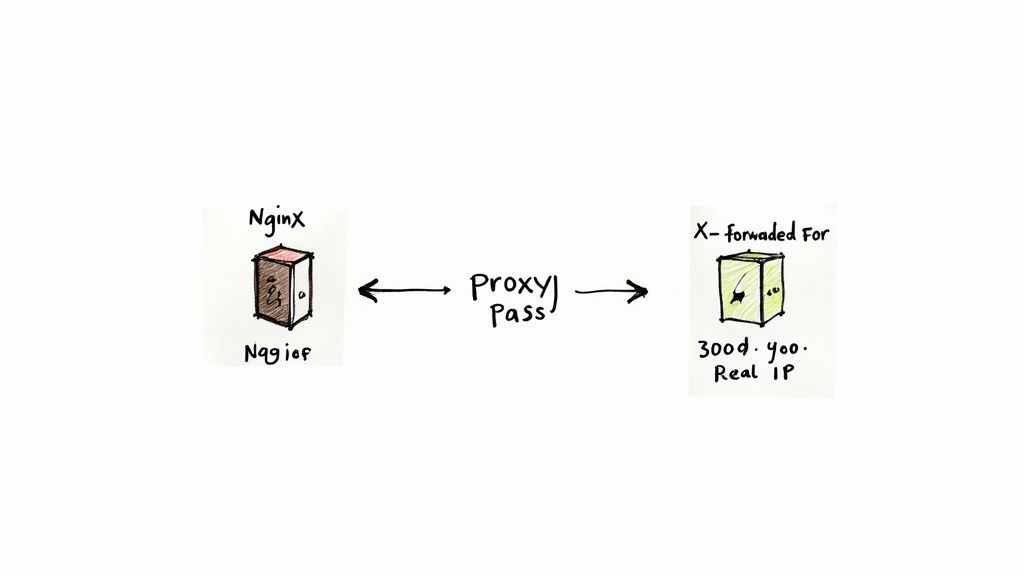
Why Does My App See the Proxy IP Instead of the User's IP?
This is a common issue. When a reverse proxy is placed in front of an application, the backend server's logs will show all traffic originating from the proxy's own IP address. This disrupts logging, analytics, and security features that rely on the client's source IP.
The solution requires a two-step process:
- Configure the Proxy to Pass the IP: Modify your reverse proxy configuration to add a specific HTTP header to each request it forwards. The standard headers for this purpose are
X-Forwarded-For(which may contain a list of IPs if there are multiple proxies) andX-Real-IP(which should contain the direct client IP). - Configure the Application to Trust the Header: Your backend application or web framework must be configured to trust requests originating from your proxy's IP address. When it receives a request from a trusted proxy, it should be instructed to look for the
X-Forwarded-FororX-Real-IPheader and use its value as the true client IP address.
Navigating the complexities of reverse proxies, load balancers, and production-ready infrastructure requires deep expertise. OpsMoon provides access to the top 0.7% of remote DevOps engineers who can design, build, and manage your entire cloud environment. Start with a free work planning session to map out your infrastructure goals. https://opsmoon.com