A Hands-On Docker Container Tutorial for Beginners
 By opsmoon
Dive into this Docker container tutorial for beginners. Learn how to install, build, and deploy containerized applications with real-world examples and code.

This guide is a practical, no-fluff Docker container tutorial for beginners. My goal is to get you from zero to running your first containerized application, focusing only on the essential, hands-on skills you need to build, run, and manage containers. This tutorial provides actionable, technical steps you can execute today.
Your First Look at Docker Containers
Welcome to your hands-on journey into Docker. If you’re an engineer, you've definitely heard someone complain about the classic "it works on my machine" problem. Docker is the tool that finally solves this by packaging an application and all its dependencies into a single, isolated unit: a container.
This ensures your application runs the same way everywhere, from your local laptop to production servers. The impact has been huge. Between 2021 and 2023, Docker's revenue shot up by over 700%, which tells you just how widespread its adoption has become in modern software development. You can dig into more of these Docker statistics on ElectroIQ if you're curious.
Core Docker Concepts Explained
Before you execute a single command, let’s define the three fundamental building blocks. Grasping these is key to everything else you'll do.
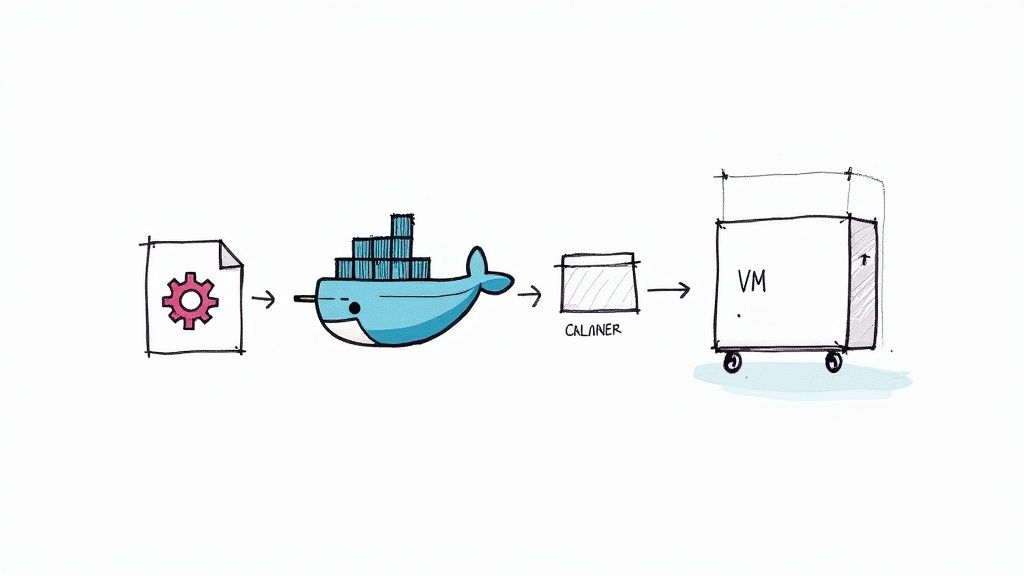
- Docker Image: An image is a read-only template containing instructions for creating a Docker container. It's a lightweight, standalone, and executable package that includes everything needed to run your software: the code, a runtime, libraries, environment variables, and config files. It is immutable.
- Docker Container: A container is a runnable instance of an image. When you "run" an image, you create a container, which is an isolated process on the host machine's OS. This is your live application, completely isolated from the host system and any other containers. You can spin up many containers from the same image.
- Dockerfile: This is a text file that contains a series of commands for building a Docker image. Each line in a Dockerfile is an instruction that adds a "layer" to the image filesystem, such as installing a dependency or copying source code. It’s your script for automating image creation.
Why Containers Beat Traditional Virtual Machines
Before containers, virtual machines (VMs) were the standard for environment isolation. A VM emulates an entire computer system—including hardware—which requires running a full guest operating system on top of the host OS via a hypervisor.
In contrast, containers virtualize the operating system itself. They run directly on the host machine's kernel and share it with other containers, using kernel features like namespaces for isolation. This fundamental difference is what makes them significantly lighter, faster to start, and less resource-intensive than VMs.
This efficiency is a primary driver for the industry's shift toward cloud native application development.
To make the distinction crystal clear, here’s a technical breakdown.
Docker Containers vs Virtual Machines at a Glance
| Feature | Docker Containers | Virtual Machines (VMs) |
|---|---|---|
| Isolation Level | Process-level isolation (namespaces, cgroups) | Full hardware virtualization (hypervisor) |
| Operating System | Share the host OS kernel | Run a full guest OS |
| Startup Time | Milliseconds to seconds | Minutes |
| Resource Footprint | Lightweight (MBs) | Heavy (GBs) |
| Performance | Near-native performance | Slower due to hypervisor overhead |
| Portability | Highly portable across any Docker-supported OS | Limited by hypervisor compatibility |
As you can see, containers offer a much more streamlined and efficient way to package and deploy applications, which is exactly why they've become a cornerstone of modern DevOps.
Setting Up Your Local Docker Environment
https://www.youtube.com/embed/gAkwW2tuIqE
Before we dive into containers and images, you must get the Docker Engine running on your machine. Let's get your local environment set up.
The standard tool for this is Docker Desktop. It bundles the Docker Engine (the core dockerd daemon), the docker command-line tool, Docker Compose for multi-container apps, and a graphical interface. For Windows or macOS, this is the recommended installation method.
The dashboard, shown below, gives you a bird's-eye view of your containers, images, and volumes.
When you're starting, this visual interface can be useful for inspecting running processes and managing resources without relying solely on terminal commands.
Installing on Windows with WSL 2
For Windows, install Docker Desktop. During setup, it will prompt you to enable the Windows Subsystem for Linux 2 (WSL 2). This is a critical step.
WSL 2 is not an emulator; it runs a full Linux kernel in a lightweight utility virtual machine. This allows the Docker daemon to run natively within a Linux environment, providing significant performance gains and compatibility compared to the older Hyper-V backend.
The installer handles the WSL 2 integration. Just download it from the official Docker site, run the executable, and follow the prompts. It configures WSL 2 automatically, providing a seamless setup.
Installing on macOS
Mac users have two primary options for installing the Docker Desktop application.
- Official Installer: Download the
.dmgfile from Docker's website, then drag the Docker icon into your Applications folder. - Homebrew: If you use the Homebrew package manager, execute the following command in your terminal:
brew install --cask docker.
Either method installs the full Docker toolset, including the docker CLI.
Installing on Linux
For Linux environments, you will install the Docker Engine directly.
While your distribution’s package manager (e.g., apt or yum) might contain a Docker package, it's often outdated. It is highly recommended to add Docker's official repository to your system to get the latest stable release.
The process varies slightly between distributions like Ubuntu or CentOS, but the general workflow is:
- Add Docker’s GPG key to verify package authenticity.
- Configure the official Docker repository in your package manager's sources list.
- Update your package list and install the necessary packages:
docker-ce(Community Edition),docker-ce-cli, andcontainerd.io. - Add your user to the
dockergroup to rundockercommands withoutsudo:sudo usermod -aG docker $USER. You will need to log out and back in for this change to take effect.
Verifying Your Installation
Once the installation is complete, perform a quick verification to ensure the Docker daemon and CLI are functional. Open your terminal or command prompt.
First, check the CLI version:
docker --version
You should see an output like Docker version 20.10.17, build 100c701. This confirms the CLI is in your PATH. Now for the real test—run a container.
docker run hello-world
This command instructs the Docker daemon to:
- Check for the
hello-world:latestimage locally. - If not found, pull the image from Docker Hub.
- Create a new container from that image.
- Run the executable within the container.
If successful, you will see a message beginning with "Hello from Docker!" This output confirms that the entire Docker stack is operational. Your environment is now ready for use.
Building and Running Your First Container
With your environment configured, it's time to execute the core commands: docker pull, docker build, and docker run.
Let's start by using a pre-built image from a public registry.
Pulling and Running an Nginx Web Server
The fastest way to run a container is to use an official image from Docker Hub. It is the default public registry for Docker images.
The scale of Docker Hub is genuinely massive. To give you an idea, it has logged over 318 billion image pulls and currently hosts around 8.3 million repositories. That's nearly 40% growth in just one year, which shows just how central containers have become. You can discover more insights about these Docker statistics to appreciate the community's scale.
We're going to pull the official Nginx image, a lightweight and high-performance web server.
docker pull nginx:latest
This command reaches out to Docker Hub, finds the nginx repository, downloads the image tagged latest, and stores it on your local machine.
Now, let's run it as a container:
docker run --name my-first-webserver -p 8080:80 -d nginx
Here is a technical breakdown of the command and its flags:
--name my-first-webserver: Assigns a human-readable name to the container instance.-p 8080:80: Publishes the container's port to the host. It maps port8080on the host machine to port80inside the container's network namespace.-d: Runs the container in "detached" mode, meaning it runs in the background. The command returns the container ID and frees up your terminal.
Open a web browser and navigate to http://localhost:8080. You should see the default Nginx welcome page. You have just launched a containerized web server in two commands.
Authoring Your First Dockerfile
Using pre-built images is useful, but the primary power of Docker lies in packaging your own applications. Let’s build a custom image for a simple Node.js application.
First, create a new directory for the project. Inside it, create a file named app.js with the following content:
const http = require('http');
const server = http.createServer((req, res) => {
  res.writeHead(200, { 'Content-Type': 'text/plain' });
  res.end('Hello from my custom Docker container!\n');
});
server.listen(3000, '0.0.0.0', () => {
  console.log('Server running on port 3000');
});
Next, in the same directory, create a file named Dockerfile (no extension). This text file contains the instructions to build your image.
# Use an official Node.js runtime as a parent image
FROM node:18-slim

# Set the working directory inside the container
WORKDIR /app

# Copy the application code into the container
COPY app.js .

# Expose port 3000 to the outside world
EXPOSE 3000

# Command to run the application
CMD ["node", "app.js"]
A quick tip on layers: Each instruction in a Dockerfile creates a new, cached filesystem layer in the final image. Docker uses a layered filesystem (like AuFS or OverlayFS). When you rebuild an image, Docker only re-executes instructions for layers that have changed. If you only modify
app.js, Docker reuses the cached layers forFROMandWORKDIR, only rebuilding theCOPYlayer and subsequent layers, making builds significantly faster.
To understand the Dockerfile, here is a breakdown of the essential instructions.
Common Dockerfile Instructions Explained
| Instruction | Purpose and Example |
|---|---|
| FROM | Specifies the base image. Every Dockerfile must start with FROM. FROM node:18-slim |
| WORKDIR | Sets the working directory for subsequent RUN, CMD, COPY, and ADD instructions. WORKDIR /app |
| COPY | Copies files or directories from the build context on your local machine into the container's filesystem. COPY . . |
| RUN | Executes commands in a new layer and commits the results. Used for installing packages. RUN npm install |
| EXPOSE | Informs Docker that the container listens on the specified network ports at runtime. This serves as documentation and can be used by other tools. EXPOSE 8080 |
| CMD | Provides the default command to execute when a container is started from the image. Only the last CMD is used. CMD ["node", "app.js"] |
This table covers the primary instructions you'll use for building images.
Building and Running Your Custom Image
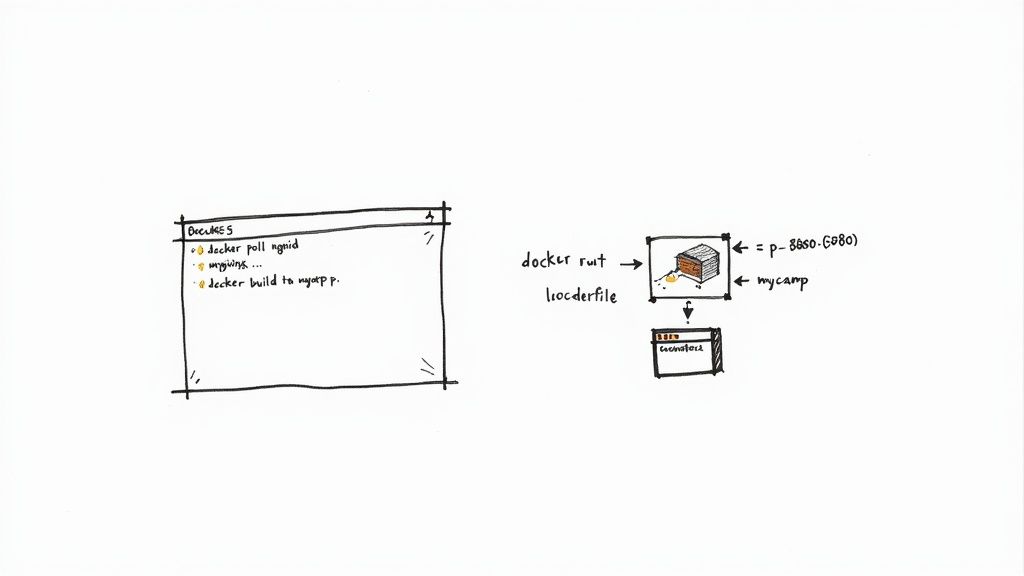
With the Dockerfile in place, build the custom image. From your terminal, inside the project directory, execute:
docker build -t my-node-app .
The -t flag tags the image with a name and optional tag (my-node-app:latest), making it easy to reference. The . at the end specifies that the build context (the files available to the COPY instruction) is the current directory.
Once the build completes, run the container:
docker run --name my-custom-app -p 8081:3000 -d my-node-app
We map port 8081 on the host to port 3000 inside the container. Navigate to http://localhost:8081 in your browser. You should see "Hello from my custom Docker container!"
You have now executed the complete Docker workflow: writing application code, defining the environment in a Dockerfile, building a custom image, and running it as an isolated container.
Managing Persistent Data with Docker Volumes
Containers are ephemeral by design. When a container is removed, any data written to its writable layer is permanently lost. This is acceptable for stateless applications, but it is a critical failure point for stateful services like databases, user uploads, or application logs.
Docker volumes solve this problem. A volume is a directory on the host machine that is managed by Docker and mounted into a container. The volume's lifecycle is independent of the container's.
Why You Should Use Named Volumes
Docker provides two main ways to persist data: named volumes and bind mounts. For most use cases, named volumes are the recommended approach. A bind mount maps a specific host path (e.g., /path/on/host) into the container, while a named volume lets Docker manage the storage location on the host.
This distinction offers several key advantages:
- Abstraction and Portability: Named volumes abstract away the host's filesystem structure, making your application more portable.
- CLI Management: Docker provides commands to create, list, inspect, and remove volumes (
docker volume create, etc.). - Performance: On Docker Desktop for macOS and Windows, named volumes often have significantly better I/O performance than bind mounts from the host filesystem.
Let's demonstrate this with a PostgreSQL container, ensuring its data persists even if the container is destroyed.
Creating and Attaching a Volume
First, create a named volume.
docker volume create postgres-data
This command creates a volume managed by Docker. You can verify its creation with docker volume ls.
Now, launch a PostgreSQL container and attach this volume. The -v (or --volume) flag maps the named volume postgres-data to the directory /var/lib/postgresql/data inside the container, which is PostgreSQL's default data directory.
docker run --name my-postgres-db -d \
  -e POSTGRES_PASSWORD=mysecretpassword \
  -v postgres-data:/var/lib/postgresql/data \
  postgres:14
With that one command, you've launched a stateful service. Any data written by the database is now stored in the
postgres-datavolume on the host, not inside the container's ephemeral filesystem.
Let's prove it by removing the container. The -f flag forces the removal of a running container.
docker rm -f my-postgres-db
The container is gone, but our volume is untouched. Now, launch a brand new PostgreSQL container and connect it to the same volume.
docker run --name my-new-postgres-db -d \
  -e POSTGRES_PASSWORD=mysecretpassword \
  -v postgres-data:/var/lib/postgresql/data \
  postgres:14
Any data created in the first container would be immediately available in this new container. This is the fundamental pattern for running any stateful application in Docker.
Orchestrating Multi-Container Apps with Docker Compose
Running a single container is a good start, but real-world applications typically consist of multiple services: a web frontend, a backend API, a database, and a caching layer. Managing the lifecycle and networking of these services with individual docker run commands is complex and error-prone.
Docker Compose is a tool for defining and running multi-container Docker applications. You use a YAML file to configure your application's services, networks, and volumes. This declarative approach makes complex local development setups reproducible and efficient.
The rise of multi-container architectures is a massive driver in the DevOps world. In fact, the Docker container market is expected to grow at a compound annual growth rate (CAGR) of 21.67% between 2025 and 2030, ballooning from $6.12 billion to $16.32 billion. Much of this surge is tied to CI/CD adoption, where tools like Docker Compose are essential for automating complex application environments.
Writing Your First docker-compose.yml File
Let's build a simple application stack with a web service that communicates with a Redis container to implement a visitor counter.
Create a new directory for your project. Inside it, create a file named docker-compose.yml with the following content:
version: '3.8'

services:
  web:
    image: python:3.9-alpine
    command: >
      sh -c "pip install redis && python -c \"
      import redis, os;
      r = redis.Redis(host='redis', port=6379, db=0);
      hits = r.incr('hits');
      print(f'Hello! This page has been viewed {hits} times.')\""
    depends_on:
      - redis

  redis:
    image: "redis:alpine"
Let's break down this configuration:
- services: This root key defines each container as a service. We have two:
webandredis. - image: Specifies the Docker image for each service.
- command: Overrides the default command for the container. Here we use
sh -cto install theredisclient and run a simple Python script. - depends_on: Expresses a startup dependency. Docker Compose will start the
redisservice before starting thewebservice. - ports: (Not used here, but common) Maps host ports to container ports, e.g.,
"8000:5000".
Launching the Entire Stack
With the docker-compose.yml file saved, launch the entire application with a single command from the same directory:
docker-compose up
You will see interleaved logs from both containers in your terminal. Docker Compose automatically creates a dedicated network for the application, allowing the web service to resolve the redis service by its name (host='redis'). This service discovery is a key feature.
Docker Compose abstracts away the complexities of container networking for local development. By enabling service-to-service communication via hostnames, it creates a self-contained, predictable environment—a core principle of microservices architectures.
This diagram helps visualize how a container can persist data using a volume—a concept you'll often manage right inside your docker-compose.yml file.
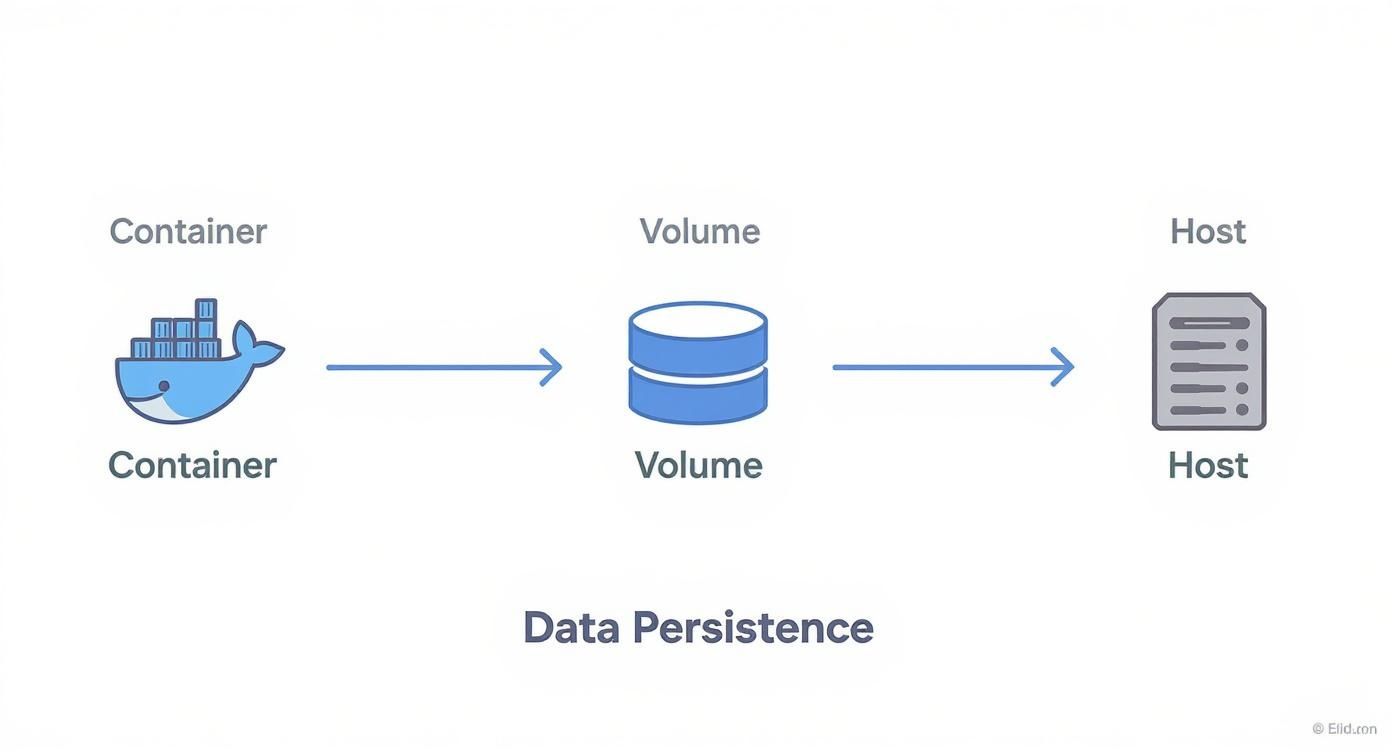
As you can see, even if the container gets deleted, the data lives on safely in the volume on your host machine.
While Docker Compose is excellent for development, production environments often require more robust orchestration. It's worth exploring the best container orchestration tools like Kubernetes and Nomad. For anyone serious about scaling applications, understanding how professionals approach advanced containerization strategies and orchestration with AWS services like ECS and EKS is a critical next step in your journey.
Common Docker Questions for Developers
As you begin using Docker, several questions frequently arise. Understanding the answers to these will solidify your foundational knowledge.
What Is the Difference Between a Docker Image and a Container
This is the most fundamental concept to internalize.
An image is a static, immutable, read-only template that packages your application and its environment. It is built from a Dockerfile and consists of a series of filesystem layers.
A container is a live, running instance of an image. It is a process (or group of processes) isolated from the host and other containers. It has a writable layer on top of the image's read-only layers where changes are stored.
A helpful analogy from object-oriented programming: An image is a class—a blueprint defining properties and methods. A container is an object—a specific, running instance of that class, with its own state. You can instantiate many container "objects" from a single image "class."
How Does Docker Networking Work Between Containers
By default, Docker attaches new containers to a bridge network. Containers on this default bridge network can communicate using their internal IP addresses, but this is not recommended as the addresses can change.
The best practice is to create a custom bridge network for your application. This is what Docker Compose does automatically. When you run docker-compose up, it creates a dedicated network for all services in your docker-compose.yml file.
This approach provides two significant advantages:
- Automatic Service Discovery: Containers on the same custom network can resolve each other using their service names as hostnames. For example, your
webservice can connect to your database atpostgres:5432without needing an IP address. Docker's embedded DNS server handles this resolution. - Improved Isolation: Custom bridge networks provide network isolation. By default, containers on one custom network cannot communicate with containers on another, enhancing security. For more on this, it's worth exploring the key Docker security best practices.
When Should I Use COPY Instead of ADD
The COPY and ADD instructions in a Dockerfile serve similar purposes, but the community consensus is clear: always prefer COPY unless you specifically need ADD's features.
COPY is straightforward. It recursively copies files and directories from the build context into the container's filesystem at a specified path.
ADD does everything COPY does but also has two additional features:
- It can use a URL as a source to download and copy a file from the internet into the image.
- If the source is a recognized compressed archive (like
.tar.gz), it will be automatically unpacked into the destination directory.
These "magic" features can lead to unexpected behavior (e.g., a remote URL changing) and security risks (e.g., "zip bomb" vulnerabilities). For clarity, predictability, and security, stick with COPY. If you need to download and unpack a file, use a RUN instruction with tools like curl and tar.
At OpsMoon, we specialize in connecting businesses with elite DevOps engineers who can navigate these technical challenges and build robust, scalable infrastructure. If you're ready to accelerate your software delivery with expert guidance, book a free work planning session with us today at https://opsmoon.com.