Pod Security Policies in 2026: A Technical Guide to Migration & Security
 By opsmoon
Pod Security Policies (PSPs) are deprecated. Learn to migrate to modern Pod Security Standards (PSS) for robust cluster security now.
For years, Pod Security Policies (PSPs) were the primary cluster-level admission controller for enforcing Kubernetes security. They provided a mechanism to define a baseline of security settings for pods, acting as a mandatory security gate for any workload attempting to run in a cluster.
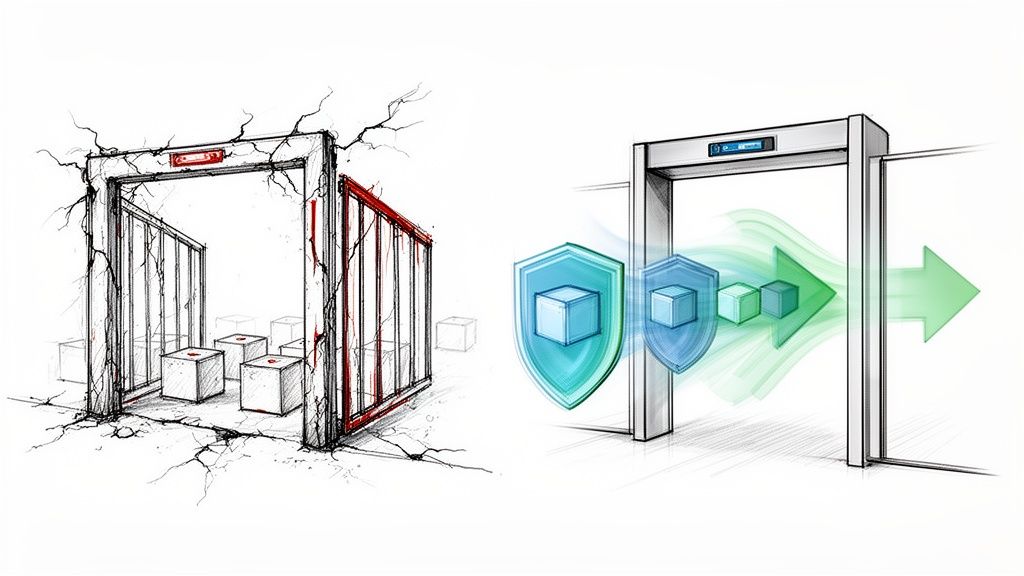
But if they were so important, why were they deprecated and removed? The story behind PSPs is a classic tale of good intentions meeting painful implementation realities, leading to a more modern, usable approach to pod security.
The Rise and Fall of Pod Security Policies

In the early days of Kubernetes, security was not always a top priority. As container adoption accelerated, the default-open nature of Kubernetes became a significant risk. A single pod with excessive permissions could easily become the entry point for an attacker to compromise an entire cluster.
Pod Security Policies were introduced to address these gaps. A PSP is a cluster-level resource that controls security-sensitive aspects of the pod specification. When enabled, the PodSecurityPolicy admission controller would intercept pod creation requests and reject any that did not meet the criteria defined by an authorized policy.
Why Pod Security Policies Were Once Essential
PSPs were designed to enforce security best practices that were missing by default. Administrators could define a standard security posture across an entire cluster, mitigating the risk of deploying vulnerable or misconfigured applications.
They were critical for enforcing controls like:
- Preventing privileged containers, which have direct access to the host kernel and devices, effectively granting root on the node (
securityContext.privileged: true). - Restricting access to host resources such as the network stack (
hostNetwork), filesystem (hostPath), and process ID space (hostPID). - Requiring pods to run as a non-root user (
runAsUser), a fundamental principle for limiting the blast radius of a container compromise. - Dropping risky Linux capabilities like
SYS_ADMINwhich could be used for privilege escalation.
In multi-tenant or production environments, these controls were essential for workload isolation and preventing container escapes. Before PSPs, achieving this level of enforcement often required complex, third-party tooling.
The Inevitable Deprecation
Despite their powerful capabilities, Pod Security Policies quickly earned a reputation for being notoriously difficult to manage. Their all-or-nothing, cluster-wide application, combined with a confusing authorization model tied to RBAC use verbs, created significant operational friction.
A common failure scenario: an administrator enables a PSP, believing they are improving security, only to find it blocks critical system components (like CNI plugins or CSI drivers) from starting. Debugging which policy was being applied and why a pod was rejected could consume hours.
The community's patience eventually ran out. The official deprecation of PSPs began with Kubernetes v1.21 (released in 2021), and they were completely removed in v1.25. This forced teams managing over 70% of production clusters to migrate to a new solution, often within a tight 18-month window.
The data highlighted the usability problem: misconfigured PSPs were known to block legitimate workloads in 40-50% of initial setups. If you want to dive deeper into the technical migration details, the folks at KodeKloud offer a great breakdown of the migration challenges.
This was not a step back for security but a step forward for usability. The modern replacements aim to deliver the same security outcomes with a more sustainable and manageable security model.
Understanding Pod Security Admission and Its Standards

The successor to Pod Security Policies is the Pod Security Admission (PSA) controller, a far more direct and developer-friendly approach to pod security.
Unlike its predecessor, PSA is a built-in admission controller enabled by default in Kubernetes versions 1.23 and newer, requiring no complex setup. Its most significant improvement is applying security rules at the namespace level via labels, completely decoupling security policy from the complex web of RBAC bindings that made PSPs so error-prone.
The Three Pod Security Standards
PSA operates by enforcing a set of predefined security profiles known as Pod Security Standards (PSS). These standards define security levels for workloads, ranging from completely unrestricted to highly hardened.
There are three built-in standards:
Privileged: An unrestricted policy that places no limitations on pod specifications. It allows for privileged containers, host resource access, and running as root. This level should be reserved for trusted, system-level workloads, typically found in thekube-systemnamespace.Baseline: A minimally restrictive policy that prevents known privilege escalations. It blocks high-risk configurations like privileged containers,hostNetwork, and the use of dangeroushostPathmounts. This is the ideal starting point for most general-purpose applications.Restricted: The most secure profile, designed for maximum hardening. It enforces current pod security best practices, such as requiring non-root execution, dropping all Linux capabilities, and applying aseccompprofile.
The primary advantage of PSS is predictability. The well-defined security tiers eliminate the guesswork of custom policy creation, providing clear, auditable rules for development teams.
Activating Security with Namespace Labels
Implementing these standards is achieved by applying labels to a Kubernetes namespace. PSA has three operational modes controlled by these labels, facilitating a safe, phased rollout.
The label format is pod-security.kubernetes.io/<MODE>: <LEVEL>, where <MODE> is one of the following and <LEVEL> is privileged, baseline, or restricted.
enforce: This mode is blocking. If a pod specification violates the defined security level, the API server will reject the pod creation request.audit: This is a non-blocking, "log-only" mode. Pods violating the policy are created, but an audit event is recorded in the Kubernetes audit log. This is essential for discovering non-compliant workloads without causing disruption. You can learn more by checking out our guide on leveraging the Kubernetes audit log.warn: This non-blocking mode allows non-compliant pods to run but returns a warning message directly to the user making the API request (e.g., viakubectl). This provides immediate feedback to developers.
Pod Security Policy (PSP) vs. Pod Security Standards (PSS)
A side-by-side comparison highlights the significant improvements in usability and predictability offered by PSS.
| Attribute | Pod Security Policy (PSP) | Pod Security Standards (PSS) |
|---|---|---|
| Activation | Required manual, cluster-wide enabling of the admission controller. | Enabled by default in Kubernetes 1.23+. |
| Binding | Policies were authorized for users or service accounts via RBAC use permissions on ClusterRole/Role. |
Policies are applied directly to namespaces via labels. |
| Policy Definition | Fully customizable from scratch using YAML. Required deep security expertise. | Comes with three predefined, standardized levels (Privileged, Baseline, Restricted). |
| User Experience | Complex, error-prone, and difficult to debug. Often caused unexpected failures. | Simple, declarative, and predictable. Easy to understand what is being enforced. |
| Rollout Strategy | Difficult to test; typically an all-or-nothing, high-risk change. | Built-in audit and warn modes enable safe, gradual, per-namespace rollouts. |
The key takeaway is that PSS provides a clear, manageable security framework that is practical to implement without introducing excessive operational complexity.
Phased Rollout Example
A powerful strategy is to use all three modes concurrently to safely migrate a namespace to a stricter policy. To move the my-secure-app namespace to the restricted standard, you can apply labels via a YAML manifest:
apiVersion: v1
kind: Namespace
metadata:
  name: my-secure-app
  labels:
    pod-security.kubernetes.io/enforce: baseline
    pod-security.kubernetes.io/warn: restricted
    pod-security.kubernetes.io/audit: restricted
This configuration achieves three objectives simultaneously:
- It enforces the
baselinestandard, preventing the creation of new, highly insecure pods. - It warns developers if their new pod deployments would violate the
restrictedstandard, providing immediate feedback. - It audits all violations against the
restrictedstandard, creating a clear remediation backlog for the security team.
This layered approach is a massive improvement over the all-or-nothing nature of the old pod security policies, providing a clear and safe migration path toward a more secure cluster.
Implementing the Baseline Standard for Everyday Security

While the privileged standard offers maximum flexibility and restricted provides maximum hardening, the majority of applications reside in the middle ground. This is the domain of the Baseline Pod Security Standard. It strikes an optimal balance between security and operational flexibility, making it the ideal default for most workloads.
The Baseline standard acts as a first line of defense, designed to mitigate the most common and well-understood privilege escalation vectors without being so strict that it breaks standard applications. Adopting it provides a significant security uplift with minimal effort.
What the Baseline Standard Prevents
The Baseline profile is a curated set of controls targeting specific high-risk configurations. It is significantly more secure than an un-policied environment but more permissive than the restricted standard.
Key controls blocked by the Baseline profile include:
- Privileged Containers: It blocks any container with
securityContext.privileged: true, a critical control since privileged containers have nearly unrestricted host access. - Host Networking and Processes: It disallows pods from using the host's network namespace (
hostNetwork: true) or process ID space (hostPID: true,hostIPC: true), preventing network snooping and interference with other node processes. - Risky
hostPathVolumes: It restrictshostPathvolume mounts to a known list of safe, read-only paths, preventing containers from writing to sensitive host directories like/etcor/var. - Disallowed Capabilities: It prevents the addition of powerful Linux capabilities beyond a safe default set, blocking access to dangerous system calls like
SYS_ADMIN.
These controls are highly effective. For example, accidentally deploying a pod with the privileged flag is a common mistake that creates a direct path for container escape. According to Snyk's 2024 threat landscape report, this misconfiguration is exploited in 28% of Kubernetes breaches. The Baseline standard eliminates this risk entirely.
Since its introduction, Baseline adoption has climbed to 65% in many enterprises due to its practicality. To dig into more data on this trend, explore Groundcover's analysis of cluster security configurations.
Applying the Baseline Profile to a Namespace
Implementing the Baseline standard is straightforward. The recommended approach is to begin in audit mode to identify potential violations before enforcing the policy.
For a namespace named app-development, you can apply the Baseline policy in enforce mode with a single kubectl command:
kubectl label --overwrite namespace app-development pod-security.kubernetes.io/enforce=baseline
This command instructs the Pod Security Admission controller to reject any new pods in that namespace that do not meet the Baseline standard. Existing pods are unaffected, but all future deployments and updates must comply.
Pro-Tip: Before applying
enforcemode, always start withauditorwarnmode. For example:kubectl label ns app-development pod-security.kubernetes.io/audit=baseline. This allows you and your development teams to identify non-compliant workloads without causing service disruptions.
Finding Non-Compliant Workloads
With audit mode enabled, violations are recorded in the cluster's audit logs. These logs become your source of truth for identifying workloads that require remediation.
An audit log entry for a violation will specify the reason for the failure. For example, if a pod attempts to use hostNetwork, the log annotation will state that hostNetwork is disallowed by the Baseline policy.
To get a quick overview of violations, you can search for Pod Security-related events across the cluster. This command provides a useful starting point:
kubectl get events --all-namespaces -o json | jq '.items[] | select(.reason == "Forbidden" and .involvedObject.kind == "Pod") | select(.message | contains("violates PodSecurity"))'
By filtering and analyzing these events, you can create a clear action plan to bring all applications into compliance, establishing a more secure and standardized environment.
Enforcing the Restricted Standard for Maximum Hardening
While the Baseline standard provides a solid security foundation, certain scenarios demand a more stringent posture. For workloads handling sensitive data, operating in regulated environments, or comprising critical infrastructure components, the Restricted Pod Security Standard is the appropriate choice.
This is Kubernetes' most stringent built-in profile, designed to enforce the principle of least privilege and significantly reduce the attack surface. However, this level of security comes with operational trade-offs: the Restricted standard is intentionally strict, and many off-the-shelf applications will not run without modification.
Key Controls of the Restricted Standard
The Restricted profile includes all controls from the Baseline standard and adds several non-negotiable requirements for maximum hardening.
The main rules enforced by the Restricted standard are:
- Forbids Running as Root: It mandates
securityContext.runAsNonRoot: true. Containers are unequivocally forbidden from running as the root user. - Drops All Capabilities: It requires that all Linux capabilities are dropped by setting
securityContext.capabilities.drop: ["ALL"]. The only exception isNET_BIND_SERVICE, which can be added back if a container needs to bind to a port below 1024 as a non-root user. - Requires a
seccompProfile: Pods must define aseccompProfileto filter the system calls a container can make. The required value isRuntimeDefaultorLocalhost, withRuntimeDefaultbeing the most common, which leverages the container runtime's default seccomp profile. - Prohibits Privilege Escalation: It mandates
securityContext.allowPrivilegeEscalation: false, which prevents a process from gaining more privileges than its parent.
The Restricted Pod Security Standard isn't for the faint-hearted—it's Kubernetes' ironclad profile, following Pod hardening best practices that slash attack surfaces by 68%, per Snyk's benchmarks on 10,000+ workloads. However, it demands read-only root filesystems, seccomp-locked syscalls, and no-root execution, which can weed out 40% of incompatible containers on initial rollout. You can discover more insights about these Kubernetes security benchmarks to understand the full impact.
A Practical Guide to Adopting the Restricted Standard
Given its strictness, a direct switch to enforce mode is highly discouraged as it will likely cause application outages. A careful, phased approach using audit and warn modes is essential for a successful implementation.
Step 1: Start with Audit Mode
Begin by applying the restricted policy in audit mode to the target namespace. This allows you to identify what would break without blocking any workloads.
kubectl label namespace your-secure-namespace \
  pod-security.kubernetes.io/audit=restricted \
  --overwrite
Monitor your audit logs. Each time a pod is created or updated that violates the Restricted standard, a log entry will detail the specific field causing the violation, providing an actionable remediation list.
Step 2: Remediate and Refactor
Using the audit logs as a guide, begin remediating your application manifests and, in some cases, the application code or container image itself.
Common fixes include:
- Updating Dockerfiles: Use a
USERinstruction to switch to a non-root user. - Modifying Deployment YAML: Add the required
securityContextfields to your pod and container specifications.securityContext: runAsNonRoot: true seccompProfile: type: RuntimeDefault allowPrivilegeEscalation: false capabilities: drop: - ALL - Refactoring Application Logic: Adjust the application so it no longer requires forbidden Linux capabilities or root access.
This phase is labor-intensive and requires close collaboration between security and development teams. For more guidance, see our article on Kubernetes security best practices for container design.
Step 3: Move to Warn Mode
Once violations in the audit logs have been addressed, switch the namespace to warn mode. This provides developers with immediate feedback if they attempt to deploy non-compliant code.
kubectl label namespace your-secure-namespace \
  pod-security.kubernetes.io/warn=restricted \
  --overwrite
This empowers developers to self-correct, as they will receive an immediate warning in their kubectl output if a deployment manifest violates the standard.
Step 4: Enable Enforcement
After running in warn mode with no new violations, you are ready to enable full enforcement.
kubectl label namespace your-secure-namespace \
  pod-security.kubernetes.io/enforce=restricted \
  --overwrite
By following this systematic process, you can achieve maximum hardening for critical services without causing chaos, transforming the Restricted standard from a daunting challenge into a powerful security tool.
A Practical Playbook for Migrating from PSP to PSS
Migrating from the deprecated pod security policies (PSP) to Pod Security Standards (PSS) can seem like a major undertaking, but a structured plan can ensure a smooth transition without disrupting production workloads. This playbook outlines a four-phase approach: discovery, analysis, phased rollout, and cleanup.
This process is analogous to upgrading a building's security system: you map every entry point, test the new system on low-risk areas, and then methodically replace the old system section by section.
Phase 1: Discover Your Current PSP Configuration
Before migrating, you need a complete inventory of your existing PSP setup. The first step is to identify which clusters are still using Pod Security Policies.
kubectl get psp
If this command returns a list of policies, your cluster is using the legacy system. If it returns an error that the resource type was not found, your cluster is on a Kubernetes version where PSPs have been removed, and no migration is needed.
Next, identify which policies are actively being used. This requires finding ClusterRole and Role resources that grant the use permission on a PSP, and the RoleBindings and ClusterRoleBindings that link them to users, groups, or service accounts.
kubectl get clusterrolebindings -o jsonpath='{range .items[*]}{.subjects[]}{"\t"}{.roleRef.name}{"\n"}{end}' | grep -E "psp|podsecuritypolicy"
This helps map which identities are bound to which policies, revealing the scope of your migration.
Phase 2: Conduct a "What-If" Analysis with Dry-Run Mode
This is the most critical phase. You will test your existing workloads against the PSS baseline and restricted standards in a non-blocking manner using audit and warn modes.
Select a non-production namespace (e.g., development or staging) to begin. Apply the baseline standard in audit mode.
kubectl label namespace your-test-namespace pod-security.kubernetes.io/audit=baseline --overwrite
This command is completely safe and will not block any deployments. It will, however, generate an audit log entry for any new pod that would have violated the baseline standard. By analyzing your cluster's audit logs, you can create a data-driven list of non-compliant workloads and the specific reasons for their non-compliance.
The goal of this phase is information gathering, not enforcement. Using
auditmode is like running a fire drill: you identify gaps and weaknesses without causing a real incident, giving teams a chance to remediate issues proactively.
Once baseline violations are addressed, you can repeat the test with the restricted standard to understand the effort required to achieve a fully hardened posture.
Phase 3: Roll Out PSS, One Namespace at a Time
With your analysis complete and initial fixes made, you can begin the rollout. A per-namespace approach is crucial for minimizing risk and maintaining manageability. For each namespace, follow a three-step cycle.
- Introduce Warnings: Apply the
warnlabel first. This provides immediate, non-blocking feedback to developers directly in their terminal output if a deployment is non-compliant.kubectl label namespace your-app-namespace pod-security.kubernetes.io/warn=baseline --overwrite - Enable Enforcement: After a period in
warnmode with no new issues, switch toenforcemode. The Pod Security Admission controller will now actively reject new pods that violate the standard.kubectl label namespace your-app-namespace pod-security.kubernetes.io/enforce=baseline --overwrite - Rinse and Repeat: Follow this audit-warn-enforce pattern for every namespace in your cluster. This methodical rhythm ensures a controlled and predictable migration.

This automation-first mindset is not limited to security policies. For insights into applying this philosophy to infrastructure management, our article on using Terraform with Kubernetes is a valuable resource.
Phase 4: Clean Up Deprecated PSP Artifacts
Once all namespaces are successfully migrated to PSS and you have verified that no legitimate workloads are being blocked, the final step is to remove the legacy PSP artifacts. Do not skip this step; it is essential for severing your dependency on the deprecated system.
You will need to delete the PodSecurityPolicy resources, as well as the associated ClusterRoles, Roles, ClusterRoleBindings, and RoleBindings that grant use permissions. Perform this cleanup methodically: delete one policy and its related RBAC bindings, then pause to ensure cluster stability before proceeding to the next. After all PSP-related objects are removed, your migration is complete.
Your Top Pod Security Questions, Answered
As teams transition from legacy pod security policies, several common questions arise. This section provides practical, technical answers to the most frequent real-world challenges.
How Do Pod Security Standards Compare to Gatekeeper or Kyverno?
This is a frequent point of confusion. The key is that PSS and policy engines like OPA/Gatekeeper or Kyverno are complementary, not competing, technologies. A robust security strategy uses both.
Pod Security Standards (PSS): PSS provides foundational, built-in security guardrails. They offer three simple, predefined levels (
Privileged,Baseline,Restricted) that are easy to enable via namespace labels. Think of them as the mandatory, baseline security hardening that applies to all pods.OPA/Gatekeeper & Kyverno: These are powerful, general-purpose policy engines that allow for custom, fine-grained policy-as-code. They can enforce rules on any Kubernetes object, not just pods. Need to require a
team-ownerlabel on all Deployments? BlockLoadBalancerservices in production namespaces? Or enforce that all images come from a trusted registry? That is the job of a policy engine.
A mature security posture leverages PSS for essential pod hardening and a tool like Kyverno or Gatekeeper to enforce organization-specific business logic, compliance rules, and advanced security constraints.
What's the Best Way to Handle Exceptions for Legacy Workloads?
Inevitably, you will encounter a critical legacy application that cannot run under the baseline or restricted standards without a significant rewrite. The temptation is to label its namespace privileged—resist this urge. It is equivalent to disabling security for an entire segment of your cluster.
A much better, risk-contained strategy is to isolate the problem:
- Create a Dedicated Namespace: Move the problematic workload into its own dedicated namespace (e.g.,
legacy-app-ns). - Apply a Specific, Looser Policy: Apply a more permissive PSS level only to that namespace while keeping others at a higher standard.
kubectl label namespace legacy-app-ns pod-security.kubernetes.io/enforce=baseline --overwrite - Document and Track the Exception: This is critical. Create a formal record of why this namespace has a relaxed policy, who the application owner is, and the remediation plan (e.g., refactoring or eventual replacement). This turns an unknown risk into a documented, managed exception.
- Enforce Network Policies: Aggressively lock down network connectivity to and from this namespace. If the legacy app only needs to communicate with a specific database and a front-end service, create a
NetworkPolicythat denies all other ingress and egress traffic.
This approach contains the risk to a small, monitored part of your cluster instead of weakening your overall security posture.
Can I Still Create Custom Policies Like I Did with PSP?
Yes, but not with the built-in Pod Security Admission (PSA). PSA was intentionally designed for simplicity, supporting only its three built-in standards to solve the complexity problem that plagued pod security policies.
For fine-grained, custom control, you must use a third-party admission controller. This is where tools like OPA/Gatekeeper and Kyverno are indispensable. They provide rich policy languages (Rego for OPA, or declarative YAML for Kyverno) to express any rule imaginable.
A classic example is creating a Kyverno policy to block images with the latest tag—a best practice that PSS does not cover but is easily enforced with a custom policy.
apiVersion: kyverno.io/v1
kind: ClusterPolicy
metadata:
  name: disallow-latest-tag
spec:
  validationFailureAction: Enforce
  rules:
  - name: validate-image-tags
    match:
      any:
      - resources:
          kinds:
          - Pod
    validate:
      message: "Using the 'latest' image tag is not allowed."
      pattern:
        spec:
          containers:
          - image: "!*:latest"
What Key Metrics Should I Monitor After Migrating to PSS?
Security is an ongoing process, not a one-time task. After migrating to PSS, you must monitor key metrics to ensure your policies are effective and not impeding operations.
Audit and Warn Events: Your audit logs are a primary source of security telemetry. Monitor PSS-related
auditandwarnevents. A sudden spike can indicate a new non-compliant application or a developer struggling with the new standards.Admission Rejections: Track the rate of pods being rejected by
enforcemode. This metric, often exposed by the API server asapiserver_admission_controller_admission_duration_seconds_count{rejected="true"}, directly measures deployment failures caused by security policies.Namespace Policy Distribution: Regularly generate a report of PSS labels across all namespaces. The goal is to maximize the number of
baselineandrestrictednamespaces while minimizingprivilegedones. Anyprivilegednamespace must be documented and justified. You can create this report with a simple script:kubectl get ns -o custom-columns="NAME:.metadata.name,ENFORCE:.metadata.labels.pod-security\.kubernetes\.io/enforce,WARN:.metadata.labels.pod-security\.kubernetes\.io/warn,AUDIT:.metadata.labels.pod-security\.kubernetes\.io/audit"
Monitoring these metrics provides real-time feedback on your security posture and helps you identify and resolve issues before they become incidents.
Navigating Kubernetes security—from ditching old pod security policies to mastering new standards—is a huge undertaking. OpsMoon connects you with the top 0.7% of DevOps experts who live and breathe this stuff. Whether you need a full security audit, a hands-on migration plan, or ongoing management to keep your clusters hardened, we provide the talent and strategy you need. Book a free work planning session today to secure your Kubernetes environment with confidence.